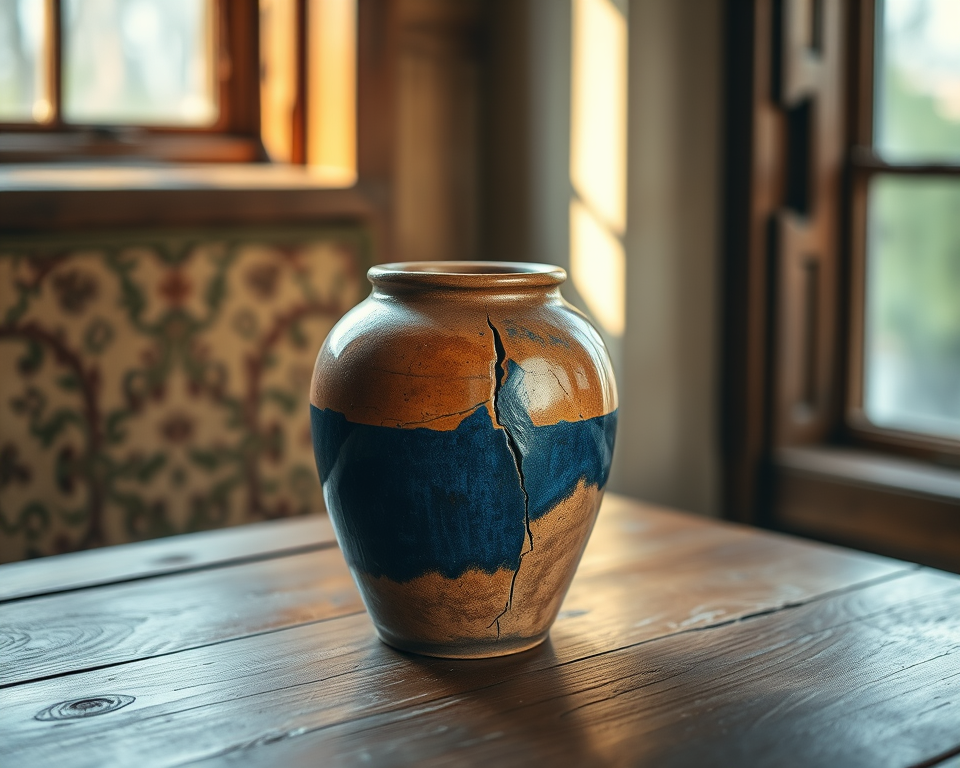
I can’t tell you how many times I’ve watched my favorite pottery pieces succumb to the unpredictable world of gravity. A lovely ceramic vase? A treasured handmade mug? Gone in a blink! But instead of throwing out my beloved damaged pottery, I’ve learned the art of restoration through meticulous research and trial-and-error. Let’s face it; being able to fix those cherished items feels like a superpower! So, buckle up while I walk you through the best options for pottery adhesives, ensuring you can repair your pottery like a pro.
Table of Contents
- 1 Key Takeaways
- 2 Types of Pottery Adhesives
- 3 Step-by-Step Application Instructions
- 4 Safety Considerations
- 5 Troubleshooting Common Issues
- 6 Community Recommendations and Testimonials
- 7 Frequently Asked Questions
- 7.1 What are the differences between epoxy glue and super glue for pottery repairs?
- 7.2 How do I properly prepare pottery pieces before gluing?
- 7.3 Can I use regular craft glue for pottery repairs?
- 7.4 How do I know if my adhesive has failed?
- 7.5 What safety precautions should I take when using adhesives?
- 7.6 How can I enhance the durability of my pottery repairs?
- 7.7 What types of specialty adhesives are available for pottery?
- 7.8 How do I troubleshoot common pottery repair issues?
- 7.9 Can I remove excess glue after applying it?
- 7.10 Are there environmentally friendly options for gluing pottery?
Key Takeaways
- Epoxy adhesives provide strong, waterproof bonds ideal for ceramics.
- Super glue is your best friend for quick fixes but may not withstand the test of time.
- PVA glue is safe and flexible; perfect for delicate projects.
- Specialty adhesives can cater to eco-conscious crafters or different pottery materials.
- Always prioritize safety when handling adhesives, and don’t forget to clean your workspace!
Types of Pottery Adhesives
When it comes to repairing pottery, you might feel overwhelmed by the sheer number of adhesives available. Don’t stress! I’ve broken down the primary types, and trust me, knowing your options makes all the difference.
Epoxy Adhesive
Let’s kick things off with epoxy. It’s like the heavyweight champion of adhesives! Think of it as a two-part system—when mixed together, these components create a waterproof and strong bond that can resist heat. If you’re like me and want to keep that favorite flower vase intact, epoxy is where it’s at.
A personal recommendation is Gorilla 2-Part Epoxy. It’s priced around $6-$8 and cures in just 20-25 minutes! Gorilla is known for its bonding strength, making it perfect for heavy-duty repairs. Plus, it’s resistant to water and temperature fluctuations. That means you can confidently display your repaired piece whether it’s the scorching summer or the chilly winter.
Super Glue
Now, on to super glue. You might remember using this handy little instant bonding agent when you were a kid. Well, it’s still a crowd favorite for ceramics! Why? Because it’s super quick—like, seriously fast! Cyanoacrylate, the fancy term for super glue, forms a strong bond almost instantly, allowing you to get back to your day.
I’ve found myself reaching for Loctite Super Glue Gel on numerous occasions. Priced around $3, it offers an easy application without the mess of traditional super glue. While this quick-fix solution is fantastic for minor repairs, I do advise caution. If your ceramic piece faces a lot of wear and tear, this might not be the most durable option long-term.
PVA Glue
Ever hear of PVA glue? This easy-to-use adhesive is water-based and non-toxic, making it a fantastic option, particularly for delicate pottery or children’s crafts. Imagine common white craft glue—yeah, that’s PVA! It gives you a flexible bond, which means your precious pieces can still handle light movements without cracking or breaking the bond.
My go-to for PVA projects is Elmer’s Craft Bond Glue, costing around $4. This glue dries clear, which is super important for aesthetic purposes. I once revamped a broken terracotta pot, and the results were spectacular! Given its gentle bonding nature, it’s ideal for lightweight ceramics.
Specialty Adhesives
And speaking of specific use, that’s where specialty adhesives come into play. If you’re looking for eco-friendly options, silicone adhesive or even organic glues can cater to your needs! Brands like Aleene’s Tacky Glue have made a name for themselves among crafters keen on sustainable options.
I’ve given Eco-Friendly Craft Adhesive by EcoPoxy a whirl—this gem costs about $12. It not only meets my crafting standards but also assures me I’m being a responsible consumer. Pottery repair doesn’t have to mean sacrificing my ethics. These specialty adhesives are often formulated specifically for certain pottery materials or surfaces, ensuring you’ll get the best bond possible.
Final Comparison of Adhesives
Now that we’ve dissected different types of fabrics, let’s get real and take a look at how they stack up against one another.
| Adhesive | Strength | Waterproof | Drying Time | Flexibility | Best Use |
|---|---|---|---|---|---|
| Gorilla Epoxy | Very Strong | Yes | 20-25 mins | Low | Heavy-duty repairs |
| Loctite Super Glue Gel | Strong | No | 10-30 seconds | Low | Quick fixes |
| Elmer’s Craft Bond Glue | Moderate | No | 1-2 hours | High | Light repairs |
| Eco-Friendly Craft Adhesive | Moderate | Yes | 1-2 hours | Moderate | Eco-conscious projects |
When it comes to choosing the right adhesive for your project, consider your pottery’s use, desired finish, and the conditions it will face post-repair.
Step-by-Step Application Instructions
Repairing pottery can feel daunting, but with the right instructions, it can be fun, almost like a mini art project! Here’s how I tackle my repairs to keep everything as seamless as possible.
Preparing Your Pieces
First things first—prep your pottery! You don’t want to glue together dirty, dusty pottery; that would be like building a house on sand. Clean surfaces = effective adhesion.
- Make sure to remove any loose pieces and dust.
- Wash the parts with soap and water, and dry them properly.
- Check that the surfaces fit together snugly without forcing.
I often set up a little workspace on my kitchen counter, making sure it’s well-lit. Good lighting helps me see any cracks I might have missed!
Mixing and Applying Adhesives
For epoxy lovers, mixing is crucial. Follow the instructions on the package, and remember that ratios are key! For super glue, all you’ll need is a squeeze. If you’ve got PVA glue, a thin even layer is ideal.
A pro tip? Always do a small test application on a scrap piece if you’re unsure about any glue. You want to ensure the bond will work and dry as you expect.
Once you’re ready to apply, here’s a preference of mine based on experience:
– For epoxy, use a small stick to apply it evenly, avoiding any excess. Those little messes can be a hassle to clean up later.
– With super glue, use the nozzle wisely; too much can cause it to seep out, ruining the neatness of your repair.
Clamping and Curing
Now, this is where patience pays off! After applying the adhesive, properly clamp the pieces together. It might sound tedious, but ensuring they’re held in place makes a world of difference in bond strength.
I typically let my pieces sit undisturbed for the amount of time recommended, which can vary based on the adhesive. For most glues, you’re looking at anywhere from 30 minutes to several hours for full curing. Keep an eye on the drying duration based on the brand and type of adhesive used.
Finishing Touches
After my piece has set, I inspect it thoroughly. Sometimes there’s a little excess glue that needs trimming, leading to some touch-up work. I often use a craft knife for delicate cleanup without risking damage to the pottery itself.
Once cleaned, if I find imperfections, a little sanding works wonders—and if you want an extra layer of protection, consider using a ceramic sealant or a clear varnish to keep your repair secure and chic!
Safety Considerations
With all this glue action, safety should never take a back seat. Trust me; you want to stay safe while channeling your inner potter!
Handling Adhesives Safely
Be sure to read and follow all safety recommendations on your adhesive’s packaging. Here are some precautions to always keep in mind:
– Wear gloves when using epoxy or super glues to avoid skin contact.
– Ensure you’re in a well-ventilated area, especially with strong adhesives.
– Keep a first aid kit handy—accidents happen, folks!
If a glue mishap occurs, act fast; rinse the area with water, and if needed, seek medical attention. It’s better to be safe than stuck with an accident!
Eco-Friendly Options
With a rise in environmental consciousness, eco-friendly options are gaining traction among creators—myself included! Using non-toxic alternatives is not just good for you but also for the planet. If you can, check labels for certifications that guarantee the material’s safety and sustainability.
Some adhesives even feature biodegradable solutions. Using a product like Titebond III Wood Glue (which is great for some pottery repair too) reflects this. It may set you back around $10, but the peace of mind of using something environmentally friendly is worth it!
Troubleshooting Common Issues
Sometimes a repair might not go as planned. Don’t sweat it; mistakes happen! Here’s how you can troubleshoot and enhance your bonding game.
Understanding Bond Failures
First, let’s identify some common bond failures:
– Poor surface preparation – If the bonding surfaces weren’t cleaned thoroughly, the adhesion can fail.
– Using the wrong type of glue – Not every adhesive is perfect for every material. Make sure to do a little research ahead of time.
– Curious drying conditions – Humidity and temperature can affect curing, particularly for super glues.
If, despite your best efforts, you end up with a bond that just isn’t holding, it might be time to clean up and start over. There’s no shame in learning through trial, right?
Repairing Broken Repairs
If your repair has broken again, don’t be discouraged! Learning from these experiences is part of the process. It helps to:
– Re-examine the adhesive used—did it match the materials?
– Ensure surfaces are prepped properly this time around.
– Consider using a more effective adhesive, such as epoxy for heavier items.
Sometimes I find that leaving the repair to sit untouched for a longer curing period can help ensure a stronger bond. Don’t rush the process; great things take time!
Community Recommendations and Testimonials
Now, let’s spice things up with some gold nuggets from our pottery community. Hearing about other enthusiasts’ experiences is often the best way to learn.
User Experiences
I love sharing my story, but it’s even better to hear from others. Many crafters can testify to the wonders that the right glue can do. For instance, I once read about an artist who repaired their grandmother’s heirloom vase using nothing but PVA glue. The project turned from a heart-wrenching situation to a delightful story of resilience and nostalgia.
Communities like Reddit’s r/Pottery or Craftster are perfect for finding glue stories, tips, and new techniques. Don’t hesitate to ask what worked and what didn’t for those engaged in this repair process.
Engaging with Pottery Enthusiasts
If you’re eager to learn more, there’s a trove of knowledge available online! Engaging with other pottery enthusiasts can open doors to new techniques, ideas, and resources. Consider joining Facebook groups or Instagram hashtags dedicated to pottery repair, and you’ll find a plethora of tips and connections.
By sharing experiences and asking for help, we not only enrich our own knowledge but build a supportive community eager to see each piece—no matter how damaged—become beautiful once more.
Frequently Asked Questions
What are the differences between epoxy glue and super glue for pottery repairs?
Epoxy glue generally consists of two components that, when mixed, create a strong and durable bond, making it ideal for larger or more stress-bearing repairs. Super glue (cyanoacrylate) is great for quick fixes and smaller pieces but may not withstand high stress or heavy use over time.
How do I properly prepare pottery pieces before gluing?
Before gluing, ensure surfaces are clean and free of dust or grease. Use a damp cloth to remove debris and allow the pottery to dry completely. This step enhances adhesion by providing a smooth surface for the glue to bond effectively.
Can I use regular craft glue for pottery repairs?
Regular craft glue, such as PVA or school glue, is not recommended for pottery repairs due to its weaker bond and limited durability, especially under stress. Consider using stronger, specialized adhesives like epoxy or specific ceramic adhesives for effective, long-lasting repairs.
How do I know if my adhesive has failed?
Signs of adhesive failure include visible gaps between the broken pieces, cracking, or if the repaired item separates under pressure. If you experience these issues, assess the previously used adhesive and consider reapplying a more appropriate adhesive after proper surface prep.
What safety precautions should I take when using adhesives?
When working with adhesives, ensure you are in a well-ventilated area to avoid inhaling fumes. Wear gloves to protect your skin and eye protection, if necessary. Always read the safety warnings on the adhesive packaging to understand potential hazards.
How can I enhance the durability of my pottery repairs?
To enhance durability, consider sealing your repaired pottery with a clear, waterproof finish after the adhesive has fully cured. This prevents moisture penetration and adds extra strength. Always follow the manufacturer’s instructions regarding curing times and application methods.
What types of specialty adhesives are available for pottery?
Specialty adhesives can include silicone adhesives, which provide flexibility and can absorb impacts, and environmentally safe options that are made from natural substances. Each serves different purposes, so choose based on the specific needs of your repair project.
How do I troubleshoot common pottery repair issues?
If your glue doesn’t hold or shows signs of failure, first check if the surfaces were clean and dry before application. If the bond is weak, consider if you used the appropriate adhesive type for your project and if the application technique was followed correctly.
Can I remove excess glue after applying it?
Yes, excess glue can usually be removed while it’s still wet using a damp cloth or sponge. For dried glue, use a craft knife or fine sandpaper carefully on non-porous surfaces. Be cautious to avoid damaging the pottery finish during this process.
Are there environmentally friendly options for gluing pottery?
Yes, there are eco-friendly adhesives available, such as biodegradable glues or those made from natural resins. Look for products labeled as non-toxic or environmentally responsible, which can offer safe alternatives for both you and the environment while still providing effective pottery repairs.