Have you ever looked at a beautifully crafted pottery piece and thought, “I’d love to make something like that?” Well, you’re not alone! Pottery is not just an art; it’s a fantastic way to tap into creativity, relieve stress, and even make some unique gifts or decor for your home. Today, I’m going to take you on an exciting journey into the world of pottery, providing you with all the knowledge to create your very first piece. Get ready, because we’re going to roll up our sleeves and make some magic happen!
Table of Contents
- 1 Key Takeaways
- 2 Tools and Materials You Need for Pottery
- 3 Step-by-Step Guide to Making Your First Pottery Piece
- 4 Troubleshooting Common Pottery Issues
- 5 Additional Resources for Pottery Enthusiasts
- 6 Frequently Asked Questions
- 6.1 What types of clay are best for beginners in pottery?
- 6.2 How can I set up an efficient pottery workspace at home?
- 6.3 What are the most common pottery mistakes to avoid as a beginner?
- 6.4 How should I care for my pottery tools?
- 6.5 What are the differences between hand-building and wheel-throwing techniques?
- 6.6 How can I troubleshoot issues with my pottery pieces during the glazing process?
- 6.7 What resources are available for further learning about pottery?
- 6.8 How does the firing process affect the final finish of pottery?
- 6.9 Can I fix cracks in my pottery after it has dried?
Key Takeaways
- Pottery requires a few essential tools and materials, which you can source easily.
- A dedicated and organized workspace significantly enhances your pottery-making experience.
- Step-by-step methods like the pinch pot and coil method are perfect for beginners.
- Troubleshooting common issues can save your projects and make you a better potter.
Tools and Materials You Need for Pottery
Essential Pottery Tools
Before we jump into making our pottery, let’s talk about what you’ll need to get started. It’s pretty overwhelming at first, but don’t sweat it! I like to think of my tools as the best buddies that help turn my clay into something beautiful. Here’s a list of the essentials:
- Pottery Wheel: If you’re interested in wheel throwing, you might want to check out the Brent EX pottery wheel. It’s portable and incredibly reliable, priced around $1,295.
- Hand-Building Tools: You can get a basic hand-tool kit from places like Amazon for about $15. They include essential tools like a rib, wire cutter, and needle tool.
- Kiln: If you’re planning to fire your pottery at home, I recommend the Paragon SC-2 Kiln ($799). It’s perfect for small projects and firing pottery up to 1,900 degrees Fahrenheit.
- Clay: You’ll want to start with something forgiving. Stoneware clay is a good choice, and you can find it for about $15 for a 25-pound bag.
- Glazes: Also grab some glazes to give your creations color. I like Amaco Velvet Underglazes, available around $15 each.
With these tools in hand, you’re already a potter in the making!
Common Types of Clay
Now, what about clay? So many choices—where do you even begin? Clay is like the foundation of your pottery journey. Here’s a quick rundown of some common types:
- Earthenware: This is often found at craft stores, super affordable, and great for beginners. It’s typically red or brown and perfect for hand-building.
- Stoneware: Sturdy and ideal for functional pottery, this clay can withstand higher temperatures and is chip-resistant—so it’s great for bowls and mugs.
- Porcelain: If you’re feeling fancy, go for porcelain. It’s renowned for its smooth feel and translucence but requires a little finesse while working with it.
When choosing your clay, consider starting with stoneware if you’re looking for durability and versatility.
Step-by-Step Guide to Making Your First Pottery Piece
Preparing Your Workspace
Creating pottery can get a little messy, so setting up an organized workspace is key to avoiding frustrations down the line. Trust me, an efficient pottery area is like having your kitchen well-stocked before trying a new recipe!
Here are some tips for preparing your workspace:
- Set Up in a Well-Ventilated Area: Working with clay can get dusty, and strong glazes need some good airflow. Find a place with at least one window.
- Organize Your Tools: A small cart or table dedicated to your supplies can make a world of difference. You don’t want to waste time searching for your wire cutter when you’re in the groove!
- Keep It Clean: Regularly clean your workspace to avoid any unwanted residue getting into your clay. That’ll just create more headaches later!
Having a setup that’s clean and organized not only boosts productivity but also gets you pumped to create!
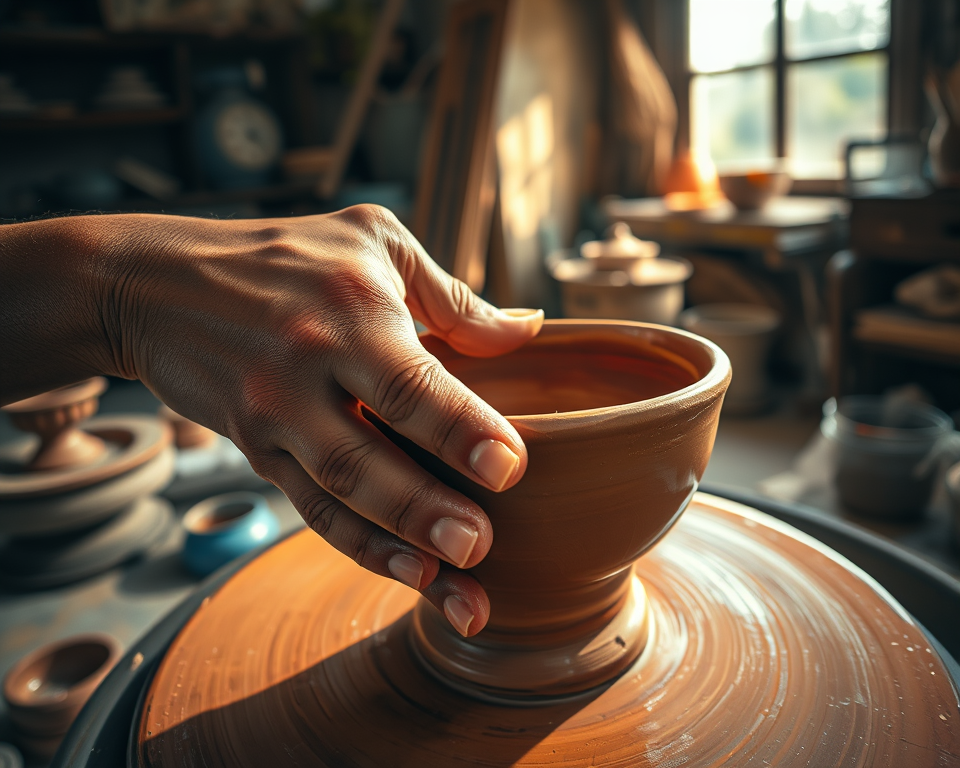
Creating Your First Piece
Alright, let’s get to the fun part—making your first pottery piece! I suggest starting with something simple like a pinch pot. It’s hands-on and excellent for getting a feel for the clay.
Here’s how to make one:
- Grab a Ball of Clay: Take about a fist-sized piece of your chosen clay and roll it into a ball.
- Pinch and Shape: Start pinching the ball, creating a small opening in the center. You’re basically creating a bowl shape—how cool is that?
- Even Out the Walls: Continue to pinch the walls of the pot until you reach your desired thickness (about ½ inch is good).
- Add Texture or Decorations: While it’s still wet, you can use a sculpting tool or even your fingernail to add cool designs.
- Let It Dry: Place your pot on a ware board and let it dry for at least 24 hours before you fire it.
It’s that easy! You’ll see how satisfying it is to create something with your own hands.
Different Techniques to Explore
Once you’ve mastered the pinch pot, you might want to venture into the coil method or slab pottery. Here’s a quick run-down:
- Coiling: Roll out long snakes of clay to stack and shape your piece. It’s super versatile and great for larger items.
- Slab Building: Roll your clay flat and cut out shapes to assemble into boxes or tiles. Think of cooler geometric designs!
With these techniques under your belt, you’ll be able to create an assortment of nifty pottery pieces.
Troubleshooting Common Pottery Issues
When you’re first starting out, it’s natural to run into a few hiccups. But don’t fret; I’ve got your back! Here are some typical issues and how to solve them.
Addressing Surface Issues
Have you noticed cracks or rough textures on your pottery? This can be a bummer, but fortunately, many of these problems have straightforward fixes.
- Cracking During Drying: Ensure your pieces dry at an even rate. If you’re in a hurry, don’t rush it. Cover your piece with plastic to slow down the drying.
- Smoothing Clay: Use a wet sponge or a rib to smooth out any imperfections on the surface.
- Fixing Surface Imperfections: If you have small cracks after drying, don’t panic! Just mix up a little slip (water and clay mixed together), and apply it to the crack.
Don’t let surface issues steal your joy—everyone experiences them; the key is to learn how to troubleshoot effectively!
Glazing and Firing Challenges
After creating your masterpiece, glazing can be another exciting challenge. Here are a few common pitfalls and how to avoid them:
- Glazing Mistakes: Ensure your piece is clean before applying glaze. Dust can lead to uneven finishes.
- Firing Pottery at Home: Follow your kiln’s instructions carefully. The right temperature is vital for ensuring your pieces come out beautifully.
- Kiln Issues: If you’re noticing uneven results, check for other items in the kiln; they may be blocking air flow. Also, don’t overcrowd your kiln!
Glazing can take your pottery from drab to fab, so don’t be afraid to experiment while keeping an eye out for these challenges.
Additional Resources for Pottery Enthusiasts
Feeling inspired? Here are some resources to keep your momentum going in the pottery world!
Online Learning Opportunities
If you’re the type who wants to learn at their own pace, there are tons of online pottery resources. I recommend checking out:
- YouTube Channels: Channels like The Clay Teacher provide fantastic beginner tutorials.
- Pottery Blogs: Websites like Pottery Heads have a wealth of information on everything from techniques to troubleshooting.
- Online Courses: Consider platforms like Skillshare for beginner pottery courses (sometimes you’ll find them for $15 for a couple of months!).
These resources can supplement your hands-on learning and expand your skills!
Pottery Communities and Support
Lastly, don’t go it alone! There’s a vibrant community of pottery lovers out there to cheer you on. Here are some ways to connect:
- Social Media Groups: Join Facebook groups dedicated to pottery; you’ll find a ton of advice and support.
- Local Pottery Studios: Check out community centers or studios, which often host classes and provide access to equipment.
- Pottery Forums: Websites like Pottery Heads Community Forum allow you to ask questions and share your progress with other pottery enthusiasts.
Connecting with others in the pottery world makes the journey a lot more enjoyable and fulfilling. You’ll learn so many tips and tricks just from sharing experiences!
| Types of Clay | Characteristics | Best For |
|---|---|---|
| Earthenware | Affordable and easy to work with | Hand-built pottery |
| Stoneware | Durable and chip-resistant | Functional pieces |
| Porcelain | Smooth, translucent, but requires finesse | Artistic pieces |
There you have it! These insights, along with the tips and tricks we’ve covered, can set you on the path to becoming a confident pottery maker. Just remember, every expert was once a beginner, so embrace the process.
Frequently Asked Questions
What types of clay are best for beginners in pottery?
For beginners, air-dry clay and earthenware are excellent options. Air-dry clay doesn’t require a kiln, making it accessible, while earthenware is forgiving and easy to shape. Stoneware is also viable for those interested in a more durable option but requires a firing process.
How can I set up an efficient pottery workspace at home?
An efficient pottery workspace should include a sturdy table or pottery wheel, storage for tools, and easy access to water and clay. Ensure proper lighting, ventilation, and enough space to move comfortably. Organizing tools by function can also streamline your workflow.
What are the most common pottery mistakes to avoid as a beginner?
Common pottery mistakes include not wedging clay properly, which can lead to air bubbles, and applying glaze too heavily, which may cause drips. Additionally, failing to properly clean and prepare the piece before firing can result in poor adhesion or unintended surface issues.
How should I care for my pottery tools?
To prolong the life of your pottery tools, clean them immediately after use with warm water and a gentle scrub. Store tools in a dry place and avoid leaving them in water, as this can lead to rust and wood warping for wooden tools.
What are the differences between hand-building and wheel-throwing techniques?
Hand-building techniques involve shaping clay using your hands and basic tools, allowing for more organic and unique forms. Wheel-throwing, on the other hand, uses a pottery wheel to create symmetrical pieces. Beginners may find hand-building less intimidating while learning fundamental skills.
How can I troubleshoot issues with my pottery pieces during the glazing process?
To troubleshoot glazing issues, first, ensure your glaze is mixed thoroughly and evenly. Avoid applying glaze too thickly, as this can result in bubbles or drips. If you encounter uneven color, check the firing temperature; it may need adjusting for proper glaze activation.
What resources are available for further learning about pottery?
Numerous resources are available, including online pottery courses, YouTube tutorials, and local pottery studios offering classes. Joining pottery forums and social media groups can also provide support and advice from experienced potters.
How does the firing process affect the final finish of pottery?
The firing process significantly impacts the final look and strength of pottery. Higher firing temperatures can enhance the glaze’s vibrancy and durability, while low-firing may yield softer colors. Always consider the clay type and glaze when determining the ideal firing temperature for your pieces.
Can I fix cracks in my pottery after it has dried?
Yes, small cracks can sometimes be fixed using slip (a mixture of clay and water) to fill the cracks. Apply the slip carefully, allow it to dry, and smooth the surface. However, large cracks may compromise the piece’s integrity, making it difficult to repair effectively.