There’s something magical about crafting your own pottery, right? You sit down at the wheel, place that lump of clay, and watch it transform into something beautiful. But have you ever stopped to think about what makes that wheel spin? I mean, we all know it moves, but how? Let’s get into the nitty-gritty of pottery wheel mechanics. Trust me, understanding this will up your pottery game.
Table of Contents
- 1 Key Takeaways
- 2 Understanding the Mechanics of a Pottery Wheel
- 3 Different Types of Pottery Wheels
- 4 Troubleshooting Common Issues
- 5 Engaging with Pottery Wheel Techniques
- 6 Understanding Pottery Wheel History and Evolution
- 7 Frequently Asked Questions
- 7.1 What is the difference between a kick wheel and an electric pottery wheel?
- 7.2 Can you use air-dry clay on a pottery wheel?
- 7.3 What maintenance does a pottery wheel require to function properly?
- 7.4 What are the common mistakes beginners make when using a pottery wheel?
- 7.5 How do I determine the right speed for my pottery wheel?
- 7.6 What should I look for when buying a used pottery wheel?
- 7.7 Can I use a pottery wheel for sculpting as well as throwing?
- 7.8 What are the benefits of taking pottery classes instead of self-teaching?
- 7.9 How can I improve my throwing techniques on a pottery wheel?
- 7.10 Is it necessary to use a splash pan when working with a pottery wheel?
Key Takeaways
- The spinning of a pottery wheel is driven by a motor or physical manipulation, depending on the wheel type.
- Control over speed and direction is crucial to mastering pottery techniques and achieving the perfect shape.
- Knowing the different types of wheels and their pros and cons can guide your purchase choice.
- Troubleshooting doesn’t have to be a nightmare; common issues have relatively simple solutions.
- Engaging with various pottery techniques beyond just throwing clay can expand your creative horizons!
Understanding the Mechanics of a Pottery Wheel
Let’s start with the basics: how does a pottery wheel actually spin? Whether you’re sitting at a super fancy electric wheel or an old-school kick wheel, there are fundamental mechanics at play that create that magical rotation.
How a Pottery Wheel Spins
In the world of pottery wheels, motion is like the lifeblood of your craft. Most pottery wheels rotate on a wheel axle, and this axle is what allows the wheel to spin smoothly. When the potter applies a force—either from a foot pedal in electric models or a kick mechanism in manual ones—the wheel starts to twirl. It’s a bit like pedaling a bicycle: once you get it going, keeping that balance becomes second nature.
The mechanics behind it involve something called centrifugal force. When you’re molding your clay, that force pushes everything outward, making it easier to shape and center your piece. So, if you’re like me and get excited watching your clay rise with that spinning motion, know that it’s more than just luck—it’s science!
“The more you understand your wheel’s mechanics, the better you’ll become at manipulating your clay.”
Control and Speed Management
Okay, so now that you know how the wheel spins, let’s talk about control. One of the most enticing features of modern pottery wheels is their speed control. Being able to adjust how fast your wheel spins is crucial, especially when you’re just starting.
Most electric pottery wheels, like the Wedgie Pottery Wheel ($449) or the Shimpo VL-Lite ($950), come equipped with easy-to-use foot pedals. You can modulate speed with your foot as you work, making it so much easier to center clay without stressing out. Now, if you went for a manual kick wheel option, remember, a quick flick of your foot creates a burst of energy that can push the wheel into motion.
Make sure you practice; fine control over speed will directly impact your ability to create the shapes you envision. Looking for an affordable model to practice with? The Creativity Street Pottery Wheel runs about $149 and is perfect for beginners, giving you some hands-on experience before you invest in the high-end options.
Different Types of Pottery Wheels
Advantages and Disadvantages of Electric vs. Manual Wheels
So, what type of pottery wheel should you choose? This is a big question for any aspiring potter. Both electric and manual pottery wheels have their perks and quirks, so let’s pit them against each other.
Electric Wheels:
– Pros:
– Easy speed control.
– Less physical effort; you can work longer without tiring.
– Great for detailed work, as the consistent speed allows for precision.
- Cons:
- They can be pricier, starting around $300 for basic models.
- Dependence on electricity means you’re out of luck during a power outage.
Manual Wheels:
– Pros:
– More affordable options available, starting at about $150.
– Typically more portable and don’t need an outlet.
– Many artists appreciate the traditional approach.
- Cons:
- Requires more effort and physical stamina.
- Steadier working pace can be challenging for beginners.
While both types have their merits, think about your pottery style and what you want out of your experience. Is it relaxation and honing your craft? Then maybe a manual kick wheel is for you. But if you’re all about efficiency and detail, an electric wheel is probably the way to go.
Choosing the Right Pottery Wheel for Your Needs
When it comes to picking a pottery wheel, there are a few factors you’ll want to consider:
- Skill Level: If you’re a newbie, look for features that promote ease of use.
- Space Availability: Do you have enough room for a larger model, or do you need something compact?
- Budget: There are great options across various price ranges—set your budget early on.
| Pottery Wheel | Price | Type | Speed Control | Ideal for |
|---|---|---|---|---|
| Wedgie | $449 | Electric | Foot pedal | Intermediate/Pro |
| Shimpo VL-Lite | $950 | Electric | Foot pedal | Intermediate/Pro |
| Creativity Street | $149 | Manual | Manual kick | Beginners |
| Giffen’s Kick Wheel | $350 | Manual | Manual kick | Intermediate |
With all that said, it’s essential to think beyond just price or brand; consider what will empower you to explore your artistic inclinations!
Troubleshooting Common Issues
Ah, troubleshooting—the stuff of every potter’s journey! If you’ve spent any time at the wheel, you’ll undoubtedly face some hiccups along the way. Here’s how to tackle the most frequent issues that pop up.
Frequently Encountered Problems and Their Solutions
Clay Not Centered: This is a classic rookie mistake. If your clay isn’t centered, make sure you’re applying even pressure as you guide it. And remember, patience is key. It takes practice to get it right!
Wheel Vibrations: If your wheel is shaking, check if it’s level. Often, just adjusting the legs or base will eliminate unwanted vibrations.
Speed Inconsistencies: If you find that your wheel suddenly slows down or speeds up, it could be related to the power supply. Moreover, ensure your wheel isn’t overloaded with clay, as that can strain the motor.
Dealing with these common errors isn’t a reason to stress; take a breath and remember it’s part of your learning curve. You get better each time!
“View every mistake not as a setback but as a stepping stone on your path to pottery mastery.”
Engaging with Pottery Wheel Techniques
Now that we’ve covered the techy stuff, let’s connect with some actual pottery techniques. The spinning clay can be a blank canvas for a range of artistic pursuits.
Step-by-Step Guide to Using a Pottery Wheel
Here’s a simple breakdown to get you started on that beautiful clay creation:
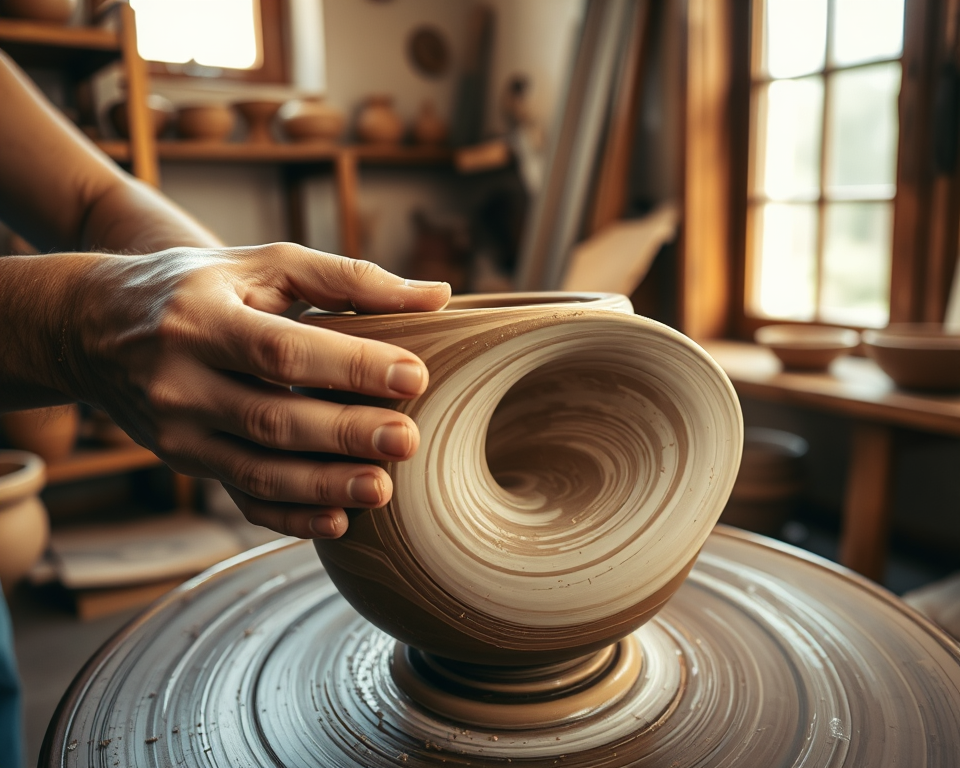
1. Preparing the Clay: Start kneading your clay to remove air and achieve a consistent texture. This step is crucial for preventing cracks later.
2. Center the Clay: Place your clay ball in the middle of the wheel. Use water to keep it moist and your hands wet to minimize sticking.
3. Start the Wheel: Select your desired speed and get that baby spinning!
4. Shaping: Apply gentle pressure as the wheel spins. You can shape it into a bowl or a vase—just keep your hands in constant contact as it turns.
5. Trim and Refine: Once you have your piece’s basic shape, use trimming tools for fine-tuning.
6. Drying and Firing: Let your pottery dry, then fire it in a kiln. Once finished, you can glaze it and fire it again for a professional look.
Engaging regularly with these techniques will evolve your skills and inspire creativity.
Understanding Pottery Wheel History and Evolution
Before we wrap this up, let’s take a moment to appreciate the rich history of pottery wheels. Did you know that the very first pottery wheel developed around 3,500 B.C. in ancient Mesopotamia? That’s right! This evolution has brought us from simple foot-powered wheels to the electric fantasies of modern-day pottery.
The wheel represents more than just a tool; it symbolizes human ingenuity and creativity. In different cultures, pottery has served as a means of expression, utility, and even salvation. Knowing the roots of your craft can deepen your appreciation and connection to what you’re creating.
“Every piece of pottery carries a history not just in its form but in the culture it represents.”
You’ve now gained insights into spinning mechanics, wheel selection, troubleshooting, and engaging pottery techniques. With all this knowledge under your belt, go ahead and take that leap. Grab your clay and let your creativity soar!
Frequently Asked Questions
What is the difference between a kick wheel and an electric pottery wheel?
Kick wheels are manually operated and rely on foot power to spin the wheel, providing a tactile experience that many potters enjoy. Electric pottery wheels, on the other hand, are powered by a motor, allowing for consistent speed and less physical effort, making them ideal for beginners who may find it challenging to use manual wheels.
Can you use air-dry clay on a pottery wheel?
No, air-dry clay is generally too stiff and not designed for wheel throwing. Pottery wheels work best with clay that is more pliable and can keep its shape when spun. For wheel throwing, use stoneware or porcelain designed for this purpose.
What maintenance does a pottery wheel require to function properly?
Regular maintenance includes cleaning the wheel after each use to prevent clay build-up, checking the belt and motor for any wear, and ensuring that the wheel head is level. Lubricating moving parts can help extend the life of your pottery wheel.
What are the common mistakes beginners make when using a pottery wheel?
Common mistakes include not centering the clay properly, applying uneven pressure while shaping, and using too much or too little water. Beginners should focus on mastering the basics of centering and pulling the clay consistently for better results.
How do I determine the right speed for my pottery wheel?
The right speed depends on the potter’s preferences and the type of piece being created. Generally, slower speeds are better for centering and shaping, while faster speeds can help with thinning the walls. Experimenting with settings will help you find what works best for you.
What should I look for when buying a used pottery wheel?
Inspect the wheel head for any warping, check motor functionality, and ensure there are no significant rust or wear issues. It’s also wise to ask about its maintenance history and if any parts have been replaced to assess its overall condition.
Can I use a pottery wheel for sculpting as well as throwing?
While pottery wheels are primarily designed for throwing, some potters creatively use them for sculpting, especially for making specific forms or repetitive shapes. However, this requires careful handling and understanding of both techniques to yield successful results.
What are the benefits of taking pottery classes instead of self-teaching?
Pottery classes provide hands-on instruction from experienced potters, which can accelerate the learning process. They also offer opportunities for feedback, access to specialized equipment, and a community of fellow potters for support and inspiration.
How can I improve my throwing techniques on a pottery wheel?
Practice is key! Focus on mastering centering, apply even pressure, and engage your whole body rather than just your hands. Watching tutorials, seeking feedback in classes, and regularly practicing will significantly enhance your skills over time.
Is it necessary to use a splash pan when working with a pottery wheel?
Yes, a splash pan collects excess water and clay trimmings, making cleanup easier and keeping the workspace tidy. It also helps prevent slipping and allows you to work more comfortably without worrying about mess.