Pottery isn’t just about molding clay; it’s about expressing creativity and exploring new avenues. Have you ever thought about using nails as a tool to elevate your pottery game? Maybe you’ve scrolled through Instagram, admiring intricate designs, and wondered how those amazing textures were created. Well, guess what? You’re in the right place! Let me walk you through some exciting ways to incorporate nails into your pottery projects that will make your ceramics not just functional, but utterly stunning.
Table of Contents
- 1 Key Takeaways
- 2 Innovative Techniques for Using Nails in Pottery
- 3 Creative Techniques for Incorporating Nails
- 4 Common Misconceptions About Nails in Pottery
- 5 Frequently Asked Questions
- 5.1 ### Can I use any type of nail in pottery?
- 5.2 How can nails be incorporated into different pottery styles?
- 5.3 What safety gear should I use when working with nails in pottery?
- 5.4 Are there specific pottery types that benefit more from nail techniques?
- 5.5 What is nail stamping in pottery, and how is it done?
- 5.6 How do I clean and maintain nails used in pottery projects?
- 5.7 Can using nails affect the firing process in ceramics?
- 5.8 What are some beginner-friendly nail techniques in pottery?
- 5.9 How do I troubleshoot if my nail techniques aren’t working as expected?
- 5.10 Are there any resources for learning more about pottery techniques involving nails?
Key Takeaways
- Using nails in pottery can create unique textures and intricate designs that set your work apart.
- Safety first! Always use the right tools and protective gear.
- Mix traditional pottery techniques with innovative methods to enhance your creative process.
- Explore community insights and learn from fellow pottery enthusiasts for fresh ideas.
Innovative Techniques for Using Nails in Pottery
First off, let’s talk about why you’d even consider nails in your pottery projects. Nails are unconventional tools, but their potential to create striking textures and designs is simply amazing. I recently experimented with different types of nails—like copper, steel, and even decorative nails that you can find at your local hardware store—and the results blew my mind.
You don’t have to break the bank to get started. A pack of assorted nails (think about $5-$10) from a hardware store can open up a world of creative possibilities. I recommend looking for copper nails for their aesthetic appeal and resistance to corrosion, which makes them great to use in ceramics.
Understanding the Basics of Pottery and Nails
Let’s crush some myths right now: Nails and pottery can definitely coexist! Whether you’re in a pottery class or just starting at home, you’ll need a few basics. Here’s what you should have in your toolkit:
- Clay: Choose a type that suits your project—earthenware or stoneware can work beautifully.
- Pottery Tools: In addition to nails, some essential tools like a rolling pin, rib, and needle tool will help you shape your work.
- Protective Gear: Keep safety goggles and gloves close. Working with nails and clay can lead to accidents if you’re not careful.
Understanding how nails interact with clay is crucial. They can be embedded to create texture or used as stamps to leave an imprint. Trust me, once you start experimenting, you won’t want to stop!
Safety Considerations When Working with Nails in Pottery
Alright, let’s get real for a second—safety should be at the forefront of every crafting session. Using nails in pottery can be super fun, but we need to make sure nothing goes wrong while we’re getting creative.
- Wear protective gear: Safety goggles and gloves are a must. Nobody wants to deal with an injured hand or eye while they’re trying to create a masterpiece.
- Choose the right space: Make sure you’re working on a stable surface. A sturdy table will do just fine, and it will keep your workspace organized.
- Be cautious with sharp objects: Nails can be sharp, and you don’t want to accidentally puncture yourself while working.
“Being safety-conscious in crafting isn’t just smart; it keeps the creative juices flowing without fear!”
So, gear up, stay mindful, and you’ll be just fine.
Creative Techniques for Incorporating Nails
Let’s get to the fun part! How can nails actually enhance your pottery? There are several texturing techniques you can play around with. Here are a few of my favorites:
Texturing Techniques
- Nail Stamping: Take a medium-sized nail and press it into the soft clay. You can do this randomly or create patterns—think of it as nail art but for pottery!
- Nail Rubbing: Use the head of a large nail to rub the surface of the clay. It creates these lovely, subtle textures that can add depth to your pieces.
- Mixed Media: Why stick to just clay? Try incorporating other materials. Use nails alongside beads, twigs, or glass to create a multidimensional look.
A quick note on selecting the right nails: use rusty or weathered nails for an earthy aesthetic, or experiment with painted heads for a pop of color.
| Nail Type | Characteristics | Ideal Uses |
|---|---|---|
| Copper Nails | Rust-resistant, attractive | Texturing, decorative details |
| Steel Nails | Sturdy, readily available | General stamping, structure |
| Decorative Nails | Unique finishes | Accents, mixed media projects |
Step-by-Step Procedures for Nail Techniques
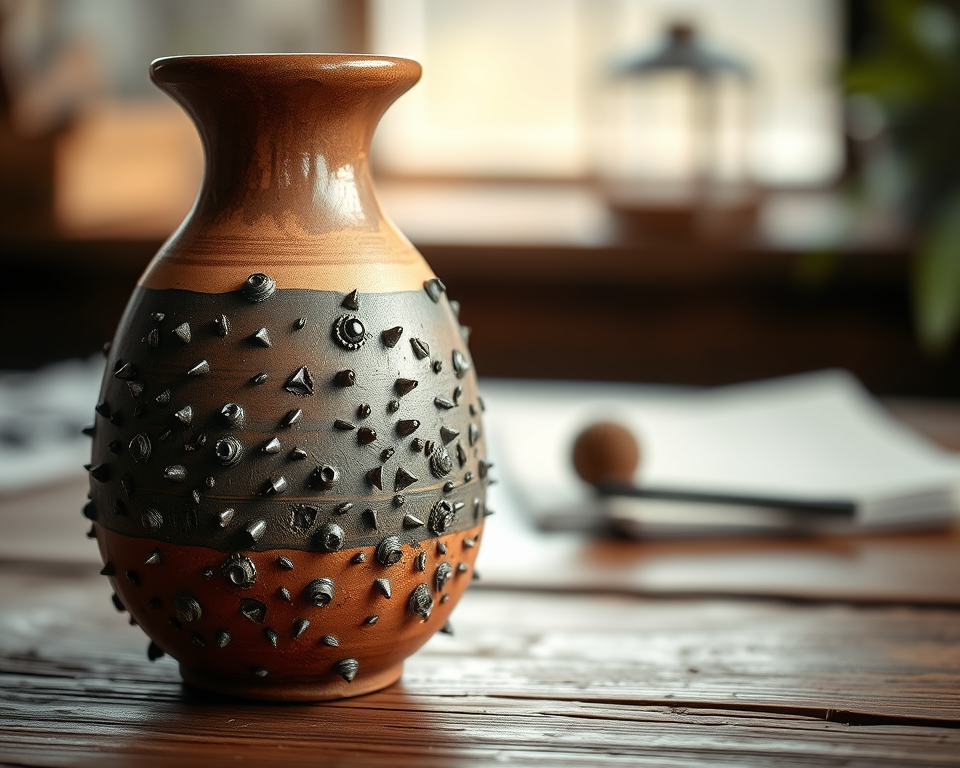
Let’s break down a simple project that utilizes nails creatively. For example, we’ll create a textured vase using nail stamping.
Materials Needed:
- Clay (earthenware is great)
- Variety pack of nails (about $10)
- Rolling pin
- Pottery toolset
- A small bowl of water
Instructions:
Prepare Your Clay: Start by kneading your earthenware clay until it’s soft and workable. This will help eliminate air bubbles.
Roll Out the Clay: Use a rolling pin to flatten a piece of clay to about 1/4 inch thick.
Stamp with Nails: Take a nail and begin gently stamping into the surface. You can press down with varying pressure to achieve different depths. Experiment—get creative with it!
Shape It: Once the stamped design is complete, shape your clay into a vase. Pinch or mold it into the desired form.
Smooth and Finish: Dip your fingers in water and smooth out any rough edges. This helps achieve a polished finish.
Dry and Fire: Let your vase dry completely before firing it in a kiln (if you have access). If you’re working with air-dry clay, let it cure as instructed on the package.
Congratulations, you just made a textured vase using nails! The beauty of this technique is that no two pieces will be the same—they’re unique.
Visual Examples and Inspiration
Sometimes, we just need a bit of eye candy to get those creative juices flowing. Take a look around online platforms like Pinterest or Instagram, and you’ll be flooded with inspiration! I love scrolling through pottery blogs or YouTube channels that showcase nail techniques in ceramics. You can see firsthand how others have applied these imaginative ideas in their work.
Here’s a quick breakdown of what to look for:
- Texture Creation: Notice how different types of nails leave distinct textures. The patterns are limitless!
- Color Play: Some potters paint their nails before stamping—this adds an extra element of wow to the finished piece.
- Mixed Media Approaches: Combining nails with other materials can yield stunning results. I’ve seen some projects that integrate vintage buttons or glass shards, which really bring out the tactile experience of the pottery.
“Finding inspiration in unexpected places can spark new ideas and innovate your processes!”
Common Misconceptions About Nails in Pottery
It’s time to tackle some of the myths surrounding the use of nails in pottery. Can nails really hold up in ceramics? Absolutely! Here’s a breakdown of some common misconceptions:
Nail Corrosion: People often worry that nails will corrode or affect the durability of the pottery. As long as you select the appropriate material, like copper, you won’t have to worry. Copper even develops a beautiful patina over time!
Nails Limit Creativity: Some believe that using tools like nails restricts artistic expression. Quite the opposite! They open up new avenues for creativity. Think of them as extensions of your artistic voice.
| Myth | Reality |
|---|---|
| Nails corrode in clay | Only if not properly selected; copper is great! |
| Nails limit creativity | Nails enhance aesthetics and design. |
Practical Tips for Beginners Using Nails in Pottery
If you’re just starting, don’t be intimidated! Here’s what I found helpful when I was getting into this whole nail-pottery mashup:
- Start Small: Begin with simple projects like coasters or small bowls. This allows you to refine your technique without feeling overwhelmed.
- Experiment Freely: If something doesn’t work out, no biggie! Pottery is all about trial and discovery. Let the process be as enjoyable as the final piece.
- Seek Community Input: Join pottery forums or social media groups. You’re bound to find others excited about crafting with nails. Learning from others can spark new ideas you hadn’t considered.
“Engaging with fellow potters not only enhances your skills but enriches your entire pottery journey!”
User-Generated Content and Community Insights
One of the best parts about diving into pottery is the community. Hopping online, I found countless others who are just as excited about using nails as I am. This sharing of ideas not only inspires personal projects but also fosters a sense of belonging in the crafting world.
Consider joining platforms like Reddit’s pottery community or Facebook groups dedicated to ceramics. These spaces are gold mines for tips, techniques, and support. You’ll find people willing to share their experiences and answer your burning questions!
Engaging with user-generated content can spark creativity. I’ve heard some amazing tales of how people turned their exploration of nails into entire series of pottery work.
Embrace the community—you never know what new ideas you’ll stumble upon next!
Frequently Asked Questions
### Can I use any type of nail in pottery?
Not all nails are suitable for pottery projects. It’s best to use rust-resistant nails (like stainless steel) to prevent corrosion and other chemical reactions with the clay during firing. Additionally, consider the nail’s size and shape to achieve the desired textural effect.
How can nails be incorporated into different pottery styles?
Nails can be incorporated creatively into various pottery styles, such as wheel-thrown or hand-built pieces. They can create texture, serve as handles, or even be used in glazing techniques. Experiment with placement and embedding to explore different aesthetic outcomes across styles.
What safety gear should I use when working with nails in pottery?
When incorporating nails, ensure to wear safety goggles to protect your eyes from flying debris. Additionally, using gloves can prevent cuts or injuries while handling sharp or small nails. Always work in a well-ventilated area when using adhesives or coatings.
Are there specific pottery types that benefit more from nail techniques?
Sculptural pottery and functional pieces like bowls and vases can greatly benefit from nail techniques. Nails can add unique surface textures and features to sculptural works, while also providing functional aspects such as grips or decorative embellishments on vases.
What is nail stamping in pottery, and how is it done?
Nail stamping involves using the head of a nail to press patterns or designs into clay. To do this, simply dip the nail in underglaze or leave it plain for more natural textures, then stamp it onto your clay surface. This technique adds dimension and character to your pieces.
How do I clean and maintain nails used in pottery projects?
To clean nails used in pottery, wipe off any clay or residue with a damp cloth immediately after use. For long-term storage, keep them in a dry place to prevent rusting. If the nails are part of finished pottery, avoid harsh chemicals; a gentle soap and water solution can be used.
Can using nails affect the firing process in ceramics?
Yes, using nails can affect the firing process. If nails are embedded in clay, ensure they are properly placed so they won’t shift during firing. Additionally, be cautious about the type of nails used, as some materials can potentially fuse with the clay and cause issues.
What are some beginner-friendly nail techniques in pottery?
Beginners can start with simple techniques like nail stamping or creating textured surfaces by pressing nails into soft clay. Combine different sizes of nails for varied effects or use larger nails as part of a design element, like handles or decorative additions on larger pieces.
How do I troubleshoot if my nail techniques aren’t working as expected?
If your nail techniques aren’t yielding the desired results, evaluate clay consistency or the pressure applied during stamping. Ensure your nails are clean and rust-free, and experiment with different sizes or patterns. Adjusting your technique based on trial and error can help you discover what works best.
Are there any resources for learning more about pottery techniques involving nails?
Yes! Consider joining pottery communities on social media or forums where artists share their techniques. Books on mixed media pottery and online tutorials can also provide valuable insights and demonstrate innovative ways to incorporate nails into your projects.