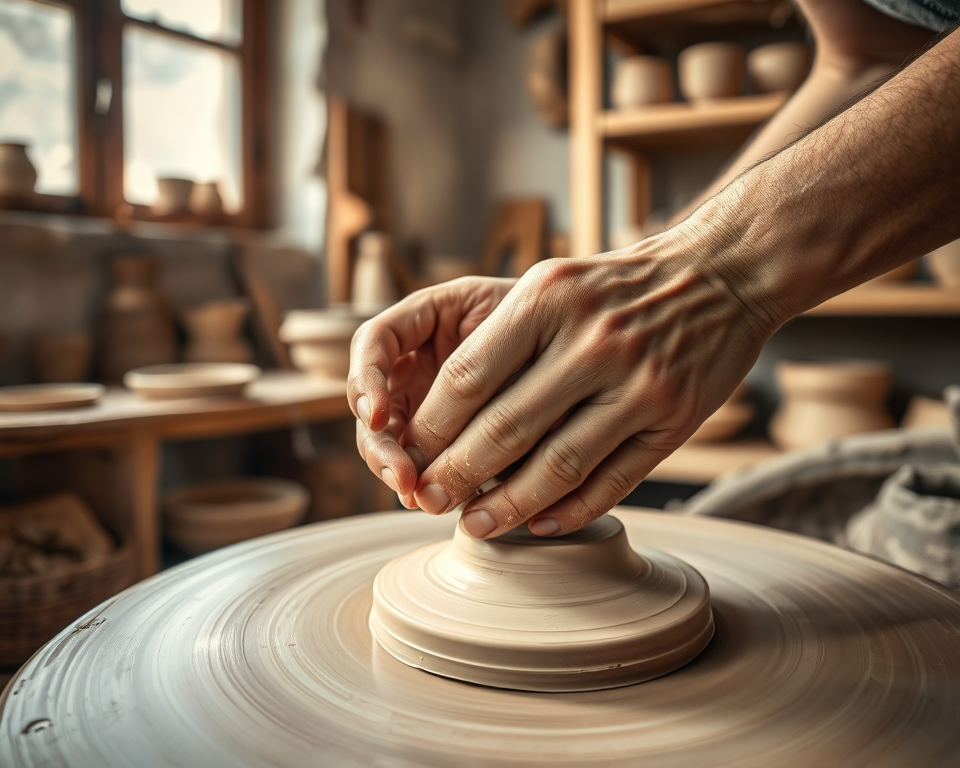
There’s something incredibly satisfying about working with pottery. I mean, who doesn’t love molding clay with their own hands and creating unique pieces? But every now and then, the glaze you lovingly applied just doesn’t give you the aesthetic you were hoping for—or worse, it’s bubbling up and looking like a hot mess. Trust me, I’ve been there. When you want a fresh look or need to fix those glaze issues, you’ll likely need to strip that glaze away. I’ve spent countless hours figuring out the best ways to remove glaze from pottery, and I’m here to share my insights!
Key Takeaways:
– You can achieve incredible results using various techniques for glaze removal, such as chemical strippers, mechanical tools, or even natural alternatives.
– Safety is key! Always wear protective gear and ensure proper ventilation when working with chemicals or power tools.
– Whether you’re a beginner or a seasoned potter, you can effectively remove glaze without stressing over damaging your pieces.
Table of Contents
- 1 Understanding the Need for Glaze Removal
- 2 Tools and Materials Required for Glaze Removal
- 3 Step-by-Step Techniques for Glaze Removal
- 4 Troubleshooting Common Glazing Problems
- 5 Visual Aids for Successful Glaze Removal
- 6 Engaging with the Pottery Community
- 7 Frequently Asked Questions
- 7.1 Why is pottery glaze removal important for maintaining ceramics?
- 7.2 What are the eco-friendly options for glaze removal?
- 7.3 Can I reuse pottery that has had its glaze stripped off?
- 7.4 What are the risks of not removing faulty glaze?
- 7.5 How can I determine if my glaze has failed?
- 7.6 What precautions should I take when using chemical strippers?
- 7.7 What tools are best for safely removing glaze without damaging pottery?
- 7.8 Can natural methods effectively remove all types of glaze?
- 7.9 Is it possible to prevent future glaze issues after removal?
Understanding the Need for Glaze Removal
When embarking on a pottery project, glaze usually serves as the finishing touch. However, sometimes it can go wrong. Let’s unpack why you might consider removing a glaze layer. Whether you’re troubleshooting glaze defects, experiencing uneven application, or wanting a little aesthetic upgrade, it’s great to learn how to manage these situations.
Common Issues with Pottery Glaze
Anyone who has ever glazed their pottery knows that it’s not all sun and rainbows. Glaze defects can occur for multiple reasons, and the last thing you want is to end up with a piece that doesn’t meet your standards. Some common issues include:
- Uneven glaze application: You thought you nailed it, but alas, there are splotchy spots.
- Bubbling: That’s right; it’s like your glaze is cooking! The bubbles can leave behind an unsightly surface.
- Color changes: Glaze could turn out darker or lighter than you anticipated, potentially ruining your masterpiece.
These imperfections can stem from kiln issues or glaze compatibility problems. Knowing when and why to strip that glaze is crucial for achieving perfection in your pottery.
Why You Might Want to Remove Glaze
So, why consider this undertaking? Well, whether you want to restore an old ceramic piece or simply update your pottery to fit your evolving style, there are plenty of reasons here. Here’s why you might want to embark on a glaze-removal adventure:
- Updating pottery: Got a older piece that just doesn’t fit your aesthetic anymore? Strip that glaze and start fresh!
- Restoring old ceramics: Those grandma gifts deserve a shiny revival, don’t they?
- Artistic expression: Sometimes, you just wanna do your thing without being locked into that one color palette.
The beauty of pottery is that it’s uniquely yours, and taking the time to understand how to adjust it is just part of the journey!
Tools and Materials Required for Glaze Removal
Alright, let’s get down to the nitty-gritty. You can’t go in blind; there are tools you’ll want under your belt for this task. Gather your supplies, and you’ll be well on your way to successful glaze removal.
List of Essential Tools for Effective Glaze Removal
When gearing up for glaze removal, having the right tools can make all the difference. Here’s a breakdown of what I recommend keeping on hand:
| Tool | Description | Price Range |
|---|---|---|
| Pottery Scraper | A must-have! Get one with a sharp edge for precise scraping. | $10-$20 |
| Rotary Tool (Dremel) | Perfect for more intricate work and offers various attachments. | $50-$150 |
| Chemical Strippers | Consider eco-friendly options like Citristrip for safer usage. | $10-$20 |
| Pumice Stone | Great for gentle abrasion without damaging the pottery. | $5-$10 |
| Sanding Pads | Ideal for post-removal smoothing, use finer grit for the perfect finish. | $5-$20 for a pack |
With this arsenal, you’ll be well-equipped to take on the task at hand!
Safety Precautions When Working with Glazes
Before you start scrubbing away, let’s talk safety. Whether you’re using chemical strippers or power tools, you have to consider your well-being. Here are some key safety tips:
- Always wear protective eyewear. Seriously, you don’t want any flying particles or chemicals getting in your eyes.
- Make sure your workspace is well-ventilated. If you’re working with chemical strippers, get some airflow going. It’s a must!
- Put on a mask if you’re working with anything that could create dust. Trust me; you’ll thank yourself later.
Getting everything in order from a safety standpoint sets a good foundation for your glaze-removal project. Remember as they say, safety first!
Step-by-Step Techniques for Glaze Removal
Now that we’re ready and equipped, let’s roll up those sleeves and go through some solid methods for getting that glaze off. Whether you’re needing to remove glaze at home or are looking for best practices for a more efficient process, I’ve got you covered!
Method 1: Chemical Strippers
Chemical glaze strippers might sound a bit intimidating (and they do require caution), but they’re incredibly effective. One product I really like is Citristrip; it’s eco-friendly, has a pleasant scent, and is tough on glaze.
- Prep your space: Lay down some old newspaper or plastic to catch any drips.
- Apply the stripper: Using a brush, apply the Citristrip evenly over the glaze.
- Wait: Let it sit for about 30 minutes. You’ll see the glaze bubble up a bit—that’s a good sign!
- Scrape it off: Use your pottery scraper to gently remove the glaze. You might need to repeat this if some remains.
- Clean and rinse: Once you’re done, wash your piece thoroughly to remove any chemical residue.
This method is quick and gets the job done effectively without too much elbow grease, but don’t forget your safety gear during the whole process!
Method 2: Mechanical Tools
For those of us who are a bit more hands-on, mechanical tools can be a game-changer. A rotary tool, like the Dremel 4000, is an excellent option for intricate work.
- Select a bit: Choose an appropriate attachment—a sanding drum might be best for larger areas, while a carbide bit works on more detailed spots.
- Start at a low speed: You don’t want to power through and ruin your pottery.
- Work in small sections: Go slowly to ensure you’re removing glaze and not the pottery itself.
- Switch bits if necessary: If you find you’re not getting the results you want, experimenting with different attachments can help.
Using mechanical tools is highly effective, but accuracy is essential—take your time to minimize any risk of damage!
Method 3: Natural Methods
If you’re looking for gentle and eco-friendly alternatives, natural methods can do the trick. One of my favorite go-tos is using vinegar.
- Soak in vinegar: Fill a bowl with white vinegar and submerge your pottery piece (if possible).
- Wait it out: Let it sit for a few hours or overnight if the glaze is stubborn.
- Scrub: After soaking, use a soft cloth or pumice stone to gently scrub the glazed area.
This method is as safe as it gets! Just keep in mind that it might require a bit more patience than the harsher options, but hey, good things come to those who wait!
Troubleshooting Common Glazing Problems
Now, let’s chat about what can happen when you’ve done everything right, yet things still seem off. We all know life in the pottery lane can get tricky.
Recognizing the Signs of Improper Glaze Removal
You’ve scrubbed away, but maybe you notice some signs that things didn’t go as planned? Here are a few clues that there might have been issues with your glaze removal process:
- Surface damage: If your pottery feels rough instead of smooth, you might have applied too much pressure while scraping.
- Visible glaze remnants: If you see patches of glaze left behind, it’s a good indicator you need to go back and target those areas.
- Frequent bubbling in future applications: This could suggest that the existing glaze wasn’t fully removed.
Being attentive to what’s going on with your pottery is crucial—this will help you tackle any sneaky issues before they escalate!
Techniques to Avoid Damaging Your Pottery
As a fellow potter, I’ve made mistakes along the way, but I’ve learned how to avoid commonly made errors in glaze removal. Here’s how you can ensure you protect your investment:
- Use a gentle scraping technique. Going too hard can lead to cracks or scratches.
- Switch up your methods if one isn’t working. If the chemical strippers aren’t doing the trick, consider switching to mechanical tools instead.
- Take breaks! If you’re working on a complex piece, step away to avoid fatigue and potential mishaps.
Material integrity is key. Emphasizing care in your methods will save your beloved pottery from unnecessary distress.
Visual Aids for Successful Glaze Removal
Now that we’ve touched on techniques, let’s visualize some of this. I can’t stress how helpful imagery is when tackling glaze removal projects!
Before and After: The Transformation of Pottery
One of the most gratifying things is witnessing the transformation of your pottery. I’ve worked with pieces that had cracked glaze and, after a bit of elbow grease, transformed them into stunning showcases. Below are a few before-and-after examples from my own experiences:
“There’s something truly magical about reviving an old pottery piece. It’s like giving it a second chance to shine!”
This is what it’s about—the journey from worn-down to stunningly restored. The thrill of seeing your work come together is something you won’t forget!
Diagrams Explaining Each Technique
Creating instructional diagrams can really help clarify the process. Here’s a simple outline of methods in a visual format:
| Method | Steps Involved |
|---|---|
| Chemical Stripper | Apply, wait, scrape, clean! |
| Mechanical Tools | Select bit, work slowly, clean up! |
| Natural Methods | Soak, scrub, rinse! |
Visual resources like this make it easier to conceptualize the project, simplifying your glaze removal process!
Engaging with the Pottery Community
Last but not least, don’t forget you’re part of a vibrant pottery community. It’s a great place to share your experiences, seek advice, and learn from one another!
Sharing Your Glazing Experience
Got a success story or a mishap to report? Sharing these experiences can help others on their journey. Platforms like Facebook groups dedicated to pottery or websites like Pottery Heads are fantastic spots for discussing your projects.
“Pottery isn’t just a hobby; it’s a community experience that teaches us how to see beauty in imperfections!”
Learning from Other Potters
Don’t underestimate the power of learning from fellow potters! Whether it’s through workshops or watching videos from experienced potters, knowledge-sharing only makes us better.
- Join pottery classes (check your local community center or art studio).
- Participate in online courses.
- Connect with fellow ceramic artists on platforms like Instagram to exchange insights and tips.
In this journey of pottery, you’re never alone. Engage and learn from those who share your passion, and you’ll find that the craft only gets more enriching and enjoyable!
Frequently Asked Questions
Why is pottery glaze removal important for maintaining ceramics?
Removing glaze from pottery is essential for addressing defects such as bubbling or uneven surfaces, which can affect both aesthetics and functionality. It allows for refinishing, restoring old pieces, or creating new designs, ensuring that your ceramics remain visually appealing and structurally sound.
What are the eco-friendly options for glaze removal?
When considering eco-friendly glaze removal, look for natural strippers that utilize ingredients like vinegar or baking soda. These household items can gently strip away glaze without harsh chemicals, making them safer for you and the environment, while still being effective for minor glaze issues.
Can I reuse pottery that has had its glaze stripped off?
Yes, stripping glaze can prepare pottery for a new glaze application, restoring its surface for a fresh finish. Ensure the clay body is intact and structurally sound before re-glazing. It’s important to properly clean the surface of any residue before applying the new glaze.
What are the risks of not removing faulty glaze?
Failing to remove faulty glaze can lead to further deterioration, such as cracks or chips in the pottery due to trapped moisture. Additionally, unsightly defects may affect the pot’s usability and visual appeal, leading to an overall decline in the piece’s value and integrity.
How can I determine if my glaze has failed?
Signs of glaze failure include bubbling, discoloration, or uneven surfaces. Inspecting the pottery under good lighting will help identify these imperfections. If you notice inconsistencies in gloss or texture, it may be time to consider glaze removal and replacement for an improved finish.
What precautions should I take when using chemical strippers?
Using chemical strippers requires proper safety measures. Always work in a well-ventilated area, wear protective gloves and goggles to prevent skin and eye exposure, and follow the manufacturer’s instructions on application. Ensure to dispose of any waste materials safely and in accordance with local regulations.
What tools are best for safely removing glaze without damaging pottery?
For delicate pottery, use non-abrasive tools such as a pottery scraper, soft pumice stone, or sanding pads. A rotary tool equipped with a low-speed setting can also be effective without risking damage. Always start with the least aggressive method to preserve the pottery’s surface.
Can natural methods effectively remove all types of glaze?
Natural methods are most effective for light glaze removal or minor defects; however, they may not work well on all types of glaze or heavy applications. For tougher jobs, combining natural methods with mechanical tools or chemical strippers might yield better results.
Is it possible to prevent future glaze issues after removal?
Yes, taking measures such as properly mixing glaze, applying even coats, and following firing schedules can significantly reduce future glaze issues. Regular maintenance and proper kiln techniques also help ensure that the glaze adheres correctly, minimizing the chances of defects.