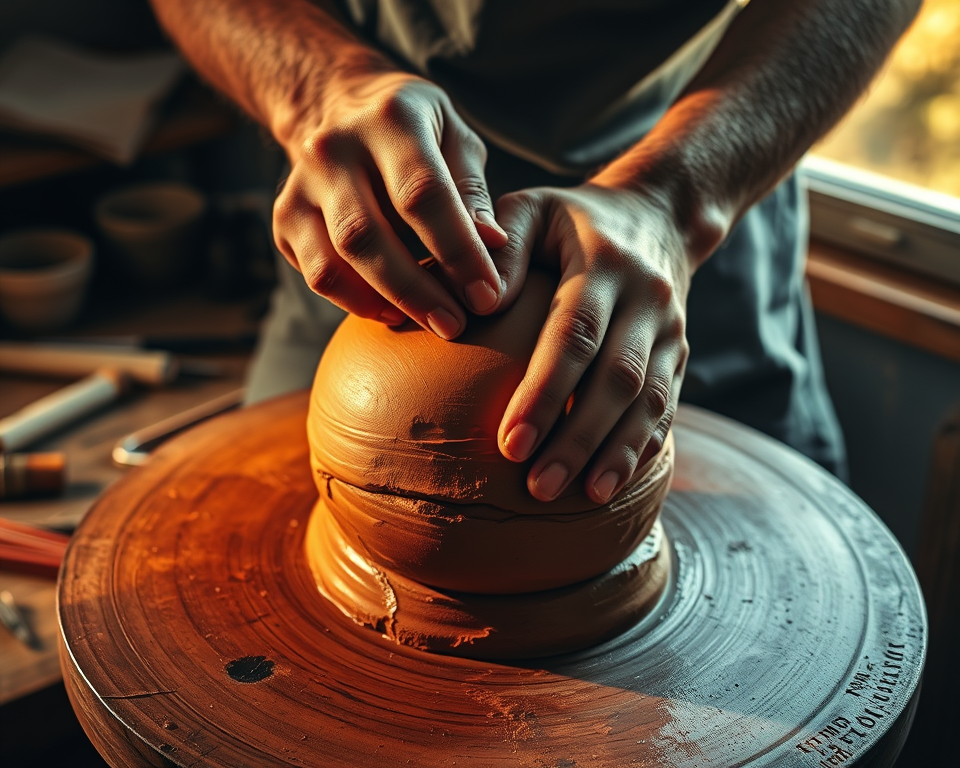
I remember my first encounter with pottery—it was like stepping into a world where my imagination could take form, and clay could transform under my fingertips. But, oh boy, the firing process? That’s where things can get a bit tricky! If you’re anything like I was, you might be wondering, “How on earth do I transform my beautiful creations into durable pieces?” Well, you’re in for a treat, my friend, because I’m here to spill all the secrets of firing pottery, and I promise you, this is gonna be a game-changer for your pottery journey!
Table of Contents
- 1 Key Takeaways
- 2 Understanding the Pottery Firing Process
- 3 Choosing the Right Kiln for Pottery
- 4 Mastering Kiln Temperatures
- 5 Safety Tips for Firing Pottery
- 6 Troubleshooting Common Firing Issues
- 7 Frequently Asked Questions
- 7.1 What is the difference between bisque firing and glaze firing?
- 7.2 How can I tell when my pottery is ready to go into the kiln?
- 7.3 What should I consider when choosing between an electric and gas kiln?
- 7.4 Are there eco-friendly firing methods for pottery?
- 7.5 What are the potential health risks associated with pottery firing?
- 7.6 How can I prevent common glaze defects during firing?
- 7.7 What is raku firing, and how is it different from traditional firing methods?
- 7.8 How can I troubleshoot underfiring issues in my pottery?
- 7.9 What safety gear should I use when working with kilns?
- 7.10 Where can I learn more about advanced kiln techniques?
Key Takeaways
- Firing pottery goes through distinct stages: bisque firing and glaze firing.
- Electric kilns are user-friendly, while gas kilns offer unique firing effects.
- Understanding temperature ranges is crucial to avoiding common mistakes in pottery.
- Safety should always come first; familiarize yourself with kiln hazards.
- Troubleshooting firing issues can save your work from the dreaded kiln failure!
Understanding the Pottery Firing Process
Stages of Pottery Firing
Okay, let’s talk about the different stages of firing. When I first started, I had no clue about these phases; I just knew I wanted my pieces to come out shiny and intact! Here’s the deal:
Bisque Firing: This is like the first step of the transformation. You fire the clay pieces to around 1,830°F (1,000°C), which removes the water and makes the clay hard enough to handle glazing. It’s like giving your pottery a solid foundation.
Glaze Firing: After glazing, your piece gets another heating session, usually at much higher temperatures, anywhere from 1,830°F to 2,380°F (1,000°C to 1,300°C) depending on the glaze you’re using. This process melts the glaze, allowing it to bond with the clay, resulting in that glossy finish we all love.
Oxidation and Reduction Firing: Two specific firing atmospheres create completely different effects. In oxidation firing, there’s plenty of oxygen in the kiln. But in reduction firing, like what you find in raku, the oxygen is limited. This creates stunning variances in color and texture.
Expect a certain flow in this process; it’s all about patience and a bit of trial and error.
Types of Firing Methods
Now, when it comes to actually getting your pieces in the kiln, you’ve got a few methods to choose from. I’ll break this down for you with some options:
Electric Kilns: These are awesome for beginners like we once were! They’re convenient and relatively straightforward—a great starting point if you want consistency and ease of use. Popular models include the Skutt KM Series, which typically retails around $1,500-$2,800 depending on the size and features.
Gas Kilns: For those who crave a bit of adventure, gas kilns welcome you into a different world. They can create beautifully unpredictable results, especially in reduction firing. The Paragon TnF Series is a solid option here, priced around $2,000, and can handle higher temperatures.
Pit Firing: This is about getting close to nature—it’s a traditional and artistic way to fire pottery by burying the pieces in combustible materials. This is where the creativity explodes, but be mindful of the unpredictability!
Raku Firing: Ah, the thrill of raku! This method involves removing pieces from the kiln at peak temperature and exposing them to combustible materials. If you’ve ever seen those stunning raku pots with crackled finishes, you know exactly why I’m a fan.
Whatever method you choose, understanding these firing techniques is key to mastering your pottery game.
Choosing the Right Kiln for Pottery
Differences Between Electric and Gas Kilns
Now, let’s get into the nitty-gritty of kilns themselves. Choosing the right kiln can feel overwhelming, especially when you’re ready to invest some cash. To break it down, here’s what I learned:
Electric Kilns: They’re the go-to for beginner and intermediate potters alike. They offer precise temperature control, are usually smaller, and can be used indoors without excessive ventilation. Models like the ConeArt 1128E, priced around $1,400, offer great functionality for home studios.
Gas Kilns: If you’re after those unique finishes or firing effects, gas is your friend. They’re often larger and more powerful, giving you versatility but requiring additional ventilation. Models like the L&L Kilns Easy-Fire Gas series are solid, with prices starting around $3,000.
If you’re lucky enough to have space for both, I’d say go for it! Each kiln has its charm and unique results.
Alternative Firing Methods
Now let’s not forget the creative firing methods that add flair to our pottery:
Pit firing: This method allows for a natural and earthy feel. All you need is a pit, combustible materials, and the star of the show—your pottery. It’s like an art project with an unpredictable twist!
Raku firing: You gotta try this if you’re feeling adventurous! Raku involves removing pieces from the kiln and placing them into combustibles, leading to spectacular metallic finishes and crackled surfaces. Remember, it’s crucial to wear gloves and protective gear for this!
It’s safe to say that exploring these methods can seriously up your ceramic game. Be prepared for some trial and error; that’s all part of the learning ride.
Mastering Kiln Temperatures
Understanding Temperature Ranges
Here’s where it gets super important: knowing your kiln temperatures. So many potters trip up at this stage by not paying attention to the right firing temperatures—they’ve either under-fired or over-fired their pieces, and trust me, it’s heartbreak city.
Bisque Firing Temperatures: Aim for around 1,830°F (1,000°C). This ensures your pottery is strong enough to handle glazing.
Glaze Firing Temperatures: This can vary based on the materials, but generally, you’re looking at anywhere from 1,830°F to 2,380°F. Checking your glaze’s requirements is a must!
| Firing Type | Temperature Range |
|---|---|
| Bisque Firing | 1,830°F (1,000°C) |
| Glaze Firing | 1,830°F – 2,380°F (1,000°C – 1,300°C) |
| Raku Firing | Typically around 1,830°F (1,000°C) |
Understanding these ranges is pivotal. It ensures that you protect your creations. We want those beauties to come out intact and stunning, don’t we?
Common Temperature Mistakes
It’s easy to fall into the trap of temperature missteps when firing pottery. You could find yourself with cracks, bloats, or worse—pieces that literally explode. Here’s how to avoid those kitchen disasters:
Overheating Pottery: This can warp or crack your pieces. Always monitor your kiln’s temperature closely.
Underfiring Issues: This leads to weak and fragile wares. It’s like a classic mishap potters face, especially new ones!
Temperature Fluctuations: Ensure your kiln has consistent heat distribution. Nobody wants surprises when it’s showtime for your work!
Learning how to control temperatures can save you from losing your hard work. Trust me, I’ve faced the heartbreak of faulty firings, and it’s not something you want to experience.
Safety Tips for Firing Pottery
Essential Safety Precautions
Safety is no joke when it comes to firing pottery. Trust me; you don’t want to skip over these crucial tips. Here’s what I do:
Always wear protective gear, including gloves and safety glasses. Your eyes will thank you!
Ventilation is key, especially with gas kilns. Make sure you’ve got a well-ventilated area and never fire in enclosed spaces.
Make sure you’re aware of your materials, especially clays and glazes. This can prevent hazardous fumes during firing.
“A secure workspace fosters creativity without compromise. Slipping in safety ensures safety is a priority.”
Understanding Firing Hazards
It’s crucial to recognize potential hazards that can arise during the firing process:
Kiln Hazards: At high temps, kilns can cause burns and fires if not handled properly. That’s why keeping an eye on your kiln is essential.
Air Quality in Studios: Some glazes can emit toxic fumes during firing; be proactive about your workspace’s air quality.
Health Risks: Long-term exposure to fine particles from clay can lead to issues. A good dust mask and proper cleaning practices go a long way.
Paying attention to safety means more work time for you and less worry—always a better trade-off!
Troubleshooting Common Firing Issues
Common Firing Challenges
Let’s face it, firing can be tricky! No one wants to pour their heart into a piece just to have it go sideways in the kiln. Here are some typical challenges I’ve seen and how to tackle them:
Cracked Pottery: Often a result of rapid temperature changes. So, take it slow during the cooling phase.
Glaze Defects: Glazes can run or pool if applied too heavily. Practice makes perfect here, and experimenting is the name of the game.
Firing Process Failures: If your kiln loses heat or doesn’t reach the required temperatures, check the elements and thermocouples to avoid future failures.
You’ll not only save your current projects but also cushion your confidence as you tackle articles and pieces in the future.
Tips for Beginners
If you’re just starting out in the world of pottery, you might be feeling overwhelmed. Here are some strategies that helped me get over that hurdle:
Start with electric kilns; they’re incredible for beginners! They simplify the process and offer a safety net as you learn.
Keep a firing log of temperatures, glazes used, and outcomes. This will be your secret weapon to understanding what works!
Experiment with small batches. Try firing a couple of pieces first to get familiar with the entire process before you dive into your larger creations.
Pottery is all about learning through experimentation, so never be afraid to make mistakes. They are, after all, the best teachers.
“In the world of pottery, each piece tells a story—some might not be perfect, but they’re all a part of your journey.”
Embrace the magic of pottery and the firing process! I promise you, once you get the hang of it, your creativity will soar; you’ll be left reflecting on why you didn’t start this journey sooner. Keep pushing your limits, and remember—the skies are the limit in the world of clay!
Frequently Asked Questions
What is the difference between bisque firing and glaze firing?
Bisque firing is the first firing stage where pottery is hardened and becomes porous, allowing for easier glazing. Glaze firing is the second stage where the applied glaze melts and bonds to the pottery surface, providing a glassy finish. Each stage has distinct temperature ranges and purposes.
How can I tell when my pottery is ready to go into the kiln?
Before firing, ensure your pottery is completely dry to prevent cracking. A good test is to lightly press your finger into the clay surface; if it leaves an imprint but doesn’t stick, it’s dry enough for firing.
What should I consider when choosing between an electric and gas kiln?
Electric kilns offer precise temperature control and are easier to use, making them ideal for beginners. Gas kilns provide a more traditional firing method and can achieve reduction effects but require a better understanding of kiln operation and maintenance.
Are there eco-friendly firing methods for pottery?
Yes, alternative firing methods like pit and wood firing can be more environmentally friendly compared to traditional gas and electric kilns. These techniques often use natural materials and contribute less to energy consumption, making them a sustainable choice for potters.
What are the potential health risks associated with pottery firing?
Firing pottery can release harmful fumes and dust, particularly when using certain glazes. It is crucial to have proper ventilation in your studio and use protective gear, such as masks and gloves, to minimize exposure to these hazards.
How can I prevent common glaze defects during firing?
To avoid defects like crawling or pinholing, ensure an even application of glaze, remove dust from the surface, and control the kiln’s temperature carefully. Adjusting the firing schedule and using the right type of glaze for your clay body can also help mitigate these issues.
What is raku firing, and how is it different from traditional firing methods?
Raku firing is a quick firing technique that typically involves removing pots from the kiln while they are still hot. This method leads to unique surface effects and is known for its unpredictability, in contrast to slower, controlled traditional firing processes.
How can I troubleshoot underfiring issues in my pottery?
Underfiring can result in weak, porous pottery. To resolve this, check your kiln’s temperature accuracy, ensure proper loading, and consider extending the firing time. Using temperature cones can also help verify that your pottery achieves the required maturity.
What safety gear should I use when working with kilns?
At a minimum, use safety goggles, gloves, and a mask to protect against dust and fumes. Additionally, wearing heat-resistant clothing can prevent burns. Always ensure your workspace has proper ventilation to enhance safety when firing pottery.
Where can I learn more about advanced kiln techniques?
Joining local pottery classes, workshops, or online pottery forums can be beneficial for learning advanced techniques. Many potters also share their experiences and tips on social media platforms, which can be a helpful resource for gaining insights into different kiln methods.