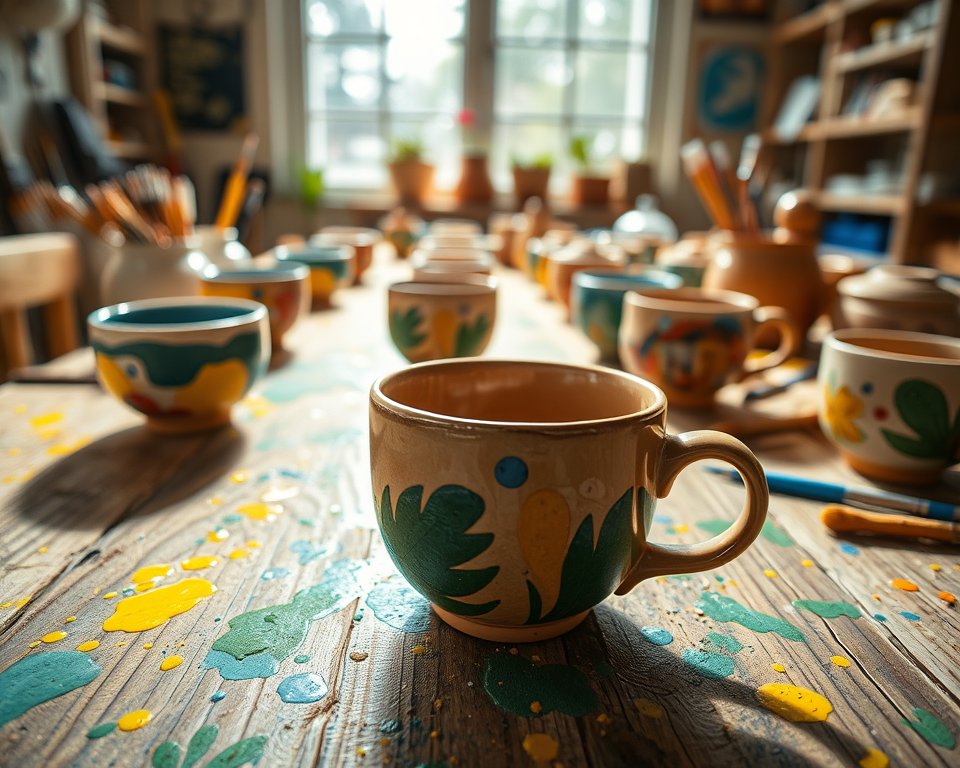
As I sat at my workspace, surrounded by vibrant colors and the smell of fresh clay, I couldn’t help but feel a surge of excitement. Painting pottery isn’t just an activity for me; it’s a passion that fuels my creativity. If you’re here, chances are you’re looking to unleash your inner artist while adding beautiful designs to your pottery pieces. Well, I’m here to tell you that you’re in for a treat! Whether you’re just starting or have dabbled a bit in ceramics, I’ve compiled ten techniques that can elevate your pottery painting game to the next level.
Key Takeaways
– Surface preparation is crucial for paint adhesion.
– Choose the right type of paint based on your project needs.
– Mastering a few essential techniques can significantly enhance your finished product.
– Learn to cure and seal your artwork to ensure longevity.
– Don’t shy away from the pottery community; it’s a vibrant and supportive space!
Table of Contents
- 1 Techniques for Surface Preparation
- 2 Selecting the Right Paints
- 3 Mastering Painting Techniques
- 4 Curing and Sealing Your Artwork
- 5 Troubleshooting Common Issues
- 6 Engaging with the Pottery Community
- 7 Embracing Eco-Friendly Options
- 8 Frequently Asked Questions
- 8.1 What is the best way to clean pottery before painting?
- 8.2 How do drying times impact pottery painting?
- 8.3 Can I mix different types of paints on pottery?
- 8.4 What should I do if my painted pottery has uneven areas?
- 8.5 How can I ensure the durability of my pottery after painting?
- 8.6 What are the benefits of using eco-friendly paints?
- 8.7 Are there specific pottery painting techniques for beginners?
- 8.8 How can I fix paint that doesn’t stick to pottery?
- 8.9 What role does community play in improving pottery painting skills?
- 8.10 What types of protective coatings are recommended for sealed pottery?
Techniques for Surface Preparation
Understanding Surface Preparation
So, let’s get to the nitty-gritty—surface preparation! Ever tried painting on a dusty or uneven surface? Trust me, it’s a recipe for disaster! Ensuring your pottery piece is immaculate is crucial for a flawless finish. You want to start with a clean palette. Start by washing your ceramics thoroughly. Use a mild dish soap and warm water to remove any grime or oils. This simple step can make all the difference in how well your paint adheres.
If you’re working with a glazed surface, you might want to lightly sand it for better adhesion. Think of this as priming your canvas. A smooth finish not only looks better but also enhances paint adhesion, making your colors pop!
Key Tips for Surface Preparation
Here are some best practices for ensuring your pottery is ready for the masterpiece you’re about to create:
- Clean Thoroughly: A clean surface equals a happy canvas. Use a soft cloth to wipe down after washing, ensuring no lint or residue is left.
- Smoothing Matters: If you notice any imperfections or bumps, use fine-grit sandpaper to smooth the surface. This extra step can truly elevate the finish.
- Prime if Necessary: Consider using a pottery painting primer for bisque ware, which can help create that ideal surface texture.
Once your pottery is prepped, you’re ready to get into the fun part—painting!
Selecting the Right Paints
Types of Paints for Pottery
Now that your pottery is prepped, it’s time to talk paint! Not all paints are created equal when it comes to ceramics, and knowing which type to choose can save you a ton of headaches.
You have a few main options: acrylics are versatile but need a sealant for durability. Underglazes can help you achieve stunning matte finishes and are ideal for detailed work. If you’re going for glossy, vibrant colors, look into ceramic glazes that offer not only beauty but also safety for food use. Let me break it down a little further:
| Paint Type | Features | Price Range | Best For |
|---|---|---|---|
| Acrylic Paint | Easy to use, water-based, affordable | $6-$15 per set | Craft projects, quick art |
| Underglaze | Matte finish, vibrant colors | $8-$20 per jar | Detailed designs |
| Ceramic Glaze | Glossy finish, food-safe, kiln-fired | $12-$30 per jar | Functional pottery |
Tips for Choosing the Best Paint
When choosing the right paint, here are some tips to keep in mind:
- Food-Safe Options: If you plan to use your pottery for food, always check for food-safe labels. Brands like AMACO and Sargent Art have great options that adhere to safety standards.
- Durability Matters: Not all paints withstand the test of time. Look into brands that have positive reviews regarding durability, like Duncan or Mayco.
- Eco-Friendly Choices: If sustainability is your jam, consider non-toxic and eco-friendly options available from brands such as Colorations.
Choosing the right paint is more than aesthetics; it’s about what you want to use the pottery for as well.
Mastering Painting Techniques
Essential Painting Techniques
Painting pottery is like telling a story—each brush stroke speaks volumes. Here are some essential techniques that I’ve found useful:
Brush Techniques: Invest in good brushes. A flat brush is great for wide strokes, while a detail brush helps with intricate designs. Brands like Princeton and Royal Brush offer excellent options that won’t break the bank.
Sponge Painting: If you want to add texture, consider sponge painting. Just get a natural sponge, dip it in your paint, and dab it onto the surface for a beautiful effect.
Layering Paint: Start with lighter colors and build up to darker shades. This method can create depth and interest in your designs.
Advanced Techniques to Try
Once you’ve got the basics down, you might feel adventurous enough to try a few advanced techniques:
- Underglaze Techniques: Try using different application methods for underglazes like pouring or sponging. These can create beautiful gradients or even tie-dye effects.
- Stencils: Using stencils can add precision to your work. They’re a lifesaver for those intricate patterns and help create professional-looking results.
- Glazing After Painting: For an extra punch, glaze over your painted pieces. Just keep in mind to only glaze the areas without underglaze, as this can affect the finish.
Painting pottery is a canvas for both your imagination and skill level. With these techniques, you can truly express yourself!
Curing and Sealing Your Artwork
Importance of Curing
You might be wondering, “What’s the big deal with curing?” Well, let me tell you, skipping this step is a common pitfall many newcomers face. Curing your pottery correctly helps ensure the longevity of your artwork. If you’re using underglazes or acrylic paints, make sure to follow the manufacturer’s instructions for drying times before firing them in a kiln. This process allows your designs to set and enhances paint durability.
Best Sealing Practices
Sealing is like the cherry on top! Once your pottery is fully cured and ready for unveiling, you’ll want to add a protective layer. Here’s a quick rundown of sealing practices to keep your artwork safe and sound:
Food-Safe Sealers: If you’re planning to use your pottery for functional purposes, go for food-safe sealants like clear gloss spray from Krylon. They come in around $12 per can and offer a durable protective coat.
Finishing Touches: Consider applying a final glaze layer for an extra gloss and protection. Make sure it’s compatible with your paints!
“A well-sealed piece is not just pretty—it’s built to last!”
Troubleshooting Common Issues
Addressing Common Pitfalls
We’ve all faced those frustrating moments when our paint just doesn’t seem to cooperate. If you’re struggling with issues like paint not sticking, cracking, or uneven application, don’t Stress! Here are common pitfalls and how to troubleshoot them:
Paint Not Sticking: Ensure your surface is not only clean but also primed, especially if it’s glazed. Also, check if the paint is appropriate for your pottery type.
Uneven Paint Application: This often comes from uneven strokes. Consistency is key, so practice makes perfect!
Cracks in the Paint: To avoid this, monitor your curing times closely. If the paint dries too fast, it can lead to cracks. Utilize slow-drying mediums if needed.
Learning from Mistakes
Mistakes are part of the journey! Each blemish or misstep is just a stepping stone toward becoming a pottery pro. Embrace constructive criticism from your peers and consider joining a pottery workshop where you can share your struggles and successes for deeper learning.
“The best way to grow is to learn from your mistakes—embrace them!”
Engaging with the Pottery Community
Finding Your Community
Stepping into the pottery world can feel overwhelming, but trust me, there’s a whole community out there ready to welcome you. Whether you’re looking for pottery clubs or online forums, you’re sure to find a supportive network. Social media is also a fantastic resource where potters share tips and showcase their work.
- Join Online Forums: Websites like Pottery Heads or Ceramic Arts Daily provide platforms for both newbies and experts alike.
Sharing Your Experience
Once you’re comfortable, don’t hold back! Showcase your pottery art on social media platforms like Instagram or Pinterest. Use hashtags like #PotteryArt and #Ceramics to connect with fellow artists. Not only is it rewarding to share your journey, but you can gather feedback that helps you grow. Plus, who doesn’t love a little recognition for their hard work?
“Art is meant to be shared, so do not shy away from showing off your masterpieces!”
Embracing Eco-Friendly Options
Understanding Eco-Friendly Paints
I can’t stress enough how important it is to consider eco-friendly options when diving into pottery painting. Non-toxic and sustainable materials not only benefit your health but also contribute positively to the environment. Brands like Colors of Nature offer natural paints made from earth minerals that are both safe and gorgeous. Investing in these materials might be a bit pricier, but knowing you’re supporting eco-conscious practices? Priceless.
Tips for Using Eco-Friendly Techniques
If you’re looking to further incorporate sustainability into your pottery practice, explore natural dyes or plant-based paints. You might find this technique not only kinder to the planet but also uniquely expressive. Additionally, try reducing waste by reusing materials—think about upcycling old pottery pieces or using leftover paint creatively in mixed media projects.
The pottery scene is filled with endless possibilities for creativity and expression. Now that you have these ten transformative techniques under your belt, it’s your turn to create art that speaks not just to you but to everyone who lays eyes on it. So roll up those sleeves, and let’s get painting!
Frequently Asked Questions
What is the best way to clean pottery before painting?
Cleaning pottery involves using a damp, soft cloth to remove dust and grease. For more stubborn residues, a mild detergent can be used. Ensure that the pottery is completely dry before applying any paint, as moisture can affect paint adhesion.
How do drying times impact pottery painting?
Drying times vary depending on the type of paint and humidity levels. For instance, underglaze usually requires a longer drying time before firing than acrylics. Adequate drying is crucial to prevent smudging and ensure that colors stay true during the curing process.
Can I mix different types of paints on pottery?
While mixing paints is possible, it’s essential to understand their properties. Acrylic and underglaze don’t always bond well, which can lead to peeling or cracking. Always test a small area before committing to a design to ensure compatibility.
What should I do if my painted pottery has uneven areas?
If you notice uneven paint application, you can sand the surface lightly once it’s dry to create a smooth texture. Afterward, reapply the paint in a thin layer, ensuring even coverage. This also helps with overall finish quality.
How can I ensure the durability of my pottery after painting?
To enhance durability, both curing and sealing are necessary. Properly firing painted pottery in a kiln is essential, followed by applying a food-safe sealer if the pottery will be used for food. This combination significantly increases longevity and usability.
What are the benefits of using eco-friendly paints?
Eco-friendly paints are typically non-toxic, reducing health risks both for the artist and the environment. They also promote sustainability by minimizing chemical waste. Using natural pigments and sustainable materials can elevate your artistry while being kinder to the planet.
Are there specific pottery painting techniques for beginners?
Beginners can start with basic brush techniques and sponge painting to achieve varied textures. Exploring layering colors is also beneficial. Engaging in pottery workshops can provide guided practice and help develop foundational skills more effectively.
How can I fix paint that doesn’t stick to pottery?
If paint isn’t adhering properly, it could be due to surface contamination or insufficient prep. Clean the surface thoroughly and consider using a primer suitable for ceramics to enhance adhesion. Testing paint on scrap pottery is always a smart step before starting your main piece.
What role does community play in improving pottery painting skills?
Engaging with the pottery community through clubs, online forums, and workshops provides valuable feedback and inspiration. Sharing experiences and techniques with others can enhance skills and foster a sense of collaboration, motivating personal growth in your craft.
What types of protective coatings are recommended for sealed pottery?
Common protective coatings include acrylic varnish and polyurethane finishes designed for ceramics. It’s crucial to choose options that are food-safe if the pottery will be used for food-related purposes. Always check product labels to ensure suitability for your projects.