Have you ever found yourself mesmerized by the beauty of handmade pottery? Maybe you’ve gazed longingly at colorful ceramic pieces in a local shop and thought, “I wish I could create something like that.” Well, I can tell you firsthand, using pottery molds is one of the easiest—and most fun—ways to dive into this rewarding craft. Getting started with molds can lead to fabulous results without the complexity of traditional hand-building methods. Trust me, with just a bit of insight and the right techniques, you’ll be making stunning pottery pieces in no time.
Key Takeaways:
– Pottery molds come in various types, each suited for different projects, ensuring you’ll find what fits your creative style.
– Using high-quality materials is crucial; they impact the durability and finish quality of your crafted pieces.
– Troubleshooting common mold issues can save you frustration and help achieve the perfect result every time.
– Engaging with pottery communities online can provide support, inspiration, and valuable tips about your endeavors.
Table of Contents
- 1 Choosing the Right Pottery Molds
- 2 Caring for and Maintaining Your Pottery Molds
- 3 Inspiring Pottery Projects Using Molds
- 4 Community Engagement and Resources
- 5 Frequently Asked Questions
- 5.1 What are the best pottery molds for specific projects?
- 5.2 How do I make DIY pottery molds at home?
- 5.3 What type of clay is best to use with different pottery molds?
- 5.4 How can I prevent clay from sticking to pottery molds?
- 5.5 What maintenance tips are essential for preserving pottery molds?
- 5.6 How do I troubleshoot issues with my pottery molds during use?
- 5.7 What are some creative project ideas using pottery molds?
- 5.8 What are the differences between plaster molds and silicone molds?
- 5.9 Are there pottery mold alternatives I can consider?
- 5.10 How can I engage with pottery communities for support?
Choosing the Right Pottery Molds
Let’s jump right into the nitty-gritty of choosing molds that align perfectly with your artistic vision. Picking the right pottery molds can make or break your project, so think of this as your first stepping stone to success.
Understanding Different Types of Pottery Molds
When I first started, I felt overwhelmed by the variety of molds available—plaster, silicone, bisque, ceramic, you name it. Each type has its unique characteristics:
- Plaster Molds: These are heavy-duty and great for more detailed work. Plus, they’re pretty reliable for creating consistent pieces.
- Silicone Molds: If you’re looking for flex and ease, silicone molds are your best pals. They’re super easy to use, and your pottery pops right out without much fuss.
- Bisque Molds: Perfect for that classic pottery touch, bisque molds can give your work an authentic ceramic feel.
- Ceramic Molds: A bit sturdier, these molds are excellent for projects that require high-temperature firings.
Choosing the right mold often depends on your project. I recommend starting with silicone molds if you’re a beginner; they’re forgiving and won’t leave you pulling your hair out trying to free a stubborn piece of clay.
Essential Materials for Pottery Molds
Now that you’re aware of the types, let’s talk about materials. Using the right ones makes all the difference!
For your projects, you typically need:
- Pottery Clay or Casting Slip: The main show! Do some research because different clays work with different molds. If you want something quick and easy, consider air-dry clay.
- Mold Release Agents: This is crucial to ensure your clay doesn’t stick like glue to the mold. Think of it as a potter’s best friend. You can use oil, spray-on silicone, or commercial agents designed for pottery use.
To give you an idea of materials, here’s a quick table comparing popular pottery clays:
| Clay Type | Characteristics | Best For | Price Range |
|---|---|---|---|
| Earthenware | Easy to mold and fire, porous | Beginners | $1-$3 per lb |
| Stoneware | Durable and resistant to chipping | Functional ware | $1.50-$4 per lb |
| Porcelain | Fine-textured, smooth finish | Decorative pieces | $2.50-$7 per lb |
Techniques for Using Pottery Molds
Alright, we’ve talked about choosing the right mold and materials, but now let’s get into how to actually use those molds to create something beautiful.
Step-by-Step Guide to Using Pottery Molds
Using a pottery mold can be incredibly satisfying. Here’s how you can get started:
Prep Your Mold: Always clean your mold thoroughly before use. This helps ensure that your pieces come out easily and with a smooth finish.
Apply the Release Agent: Don’t skip this step! Apply your release agent to the mold. It’s a quick spray, and it’ll save you a ton of frustration later.
Prepare Your Clay: Wedge your clay until it’s free of air bubbles. The amount of clay depends on your mold size—more substantial molds will obviously need more clay!
Pack It In: Take your prepared clay and pack it into your mold. Be firm but take care not to overfill.
Let It Set: After packing, allow the clay to firm up slightly but not dry out completely—this can take anywhere from 30 minutes to a few hours, depending on conditions.
Demold and Finish: Once it’s ready, gently remove your piece. If you’re using plaster, be careful to avoid too much bending or pressure.
Clean-Up: To keep your molds in shape, clean them gently after each use, removing any leftover clay bits. Trust me, taking care of them now will make them last.
“It’s all about repetition; the more you use your molds, the more you’ll understand the nuances and improve!”
Troubleshooting Common Issues with Pottery Molds
Every potter faces obstacles. Don’t worry if your first few pieces don’t come out perfect. Let’s tackle a few common issues you might run into:
Sticking Issues: If your pieces are sticking, check that you’ve applied enough release agent. Sometimes friendly advice among potters suggests using a mix of oil and powder for better results.
Air Bubbles: The enemy, right? Always wedge your clay for a bit before using it. It might sound trivial, but air bubbles can compromise your result.
Uneven Edges: If you notice uneven surfaces or ruffled edges, ensure you’re packing the clay evenly into the mold. A little extra patience goes a long way.
Caring for and Maintaining Your Pottery Molds
Great, you’re making beautiful pottery! But wait—how do you take care of those molds that helped you along the way?
Best Practices for Cleaning and Storing Pottery Molds
Preserving your molds will keep them in top shape, and it’s easier than you think! Here are a few of my go-to tips:
Cleaning Techniques: Rinse down your molds with water and clean them with a mild detergent. Avoid scrubbing too hard to prevent damage. For stubborn clay, a soft sponge or toothbrush does wonders.
Proper Storage Methods: Store molds in a cool, dry place, preferably stacked or covered to protect them from dust and potential damage.
Maintaining Longevity: Try not to leave the clay in uncleaned molds for too long. It’s better to demold and clean them as soon as you’re done—trust me, your future self will thank you!
Repairing and Retiring Older Pottery Molds
Over time, molds can wear out. But repairing them can be entirely feasible!
Mold Repair Tips: Use plaster to patch any cracks. Mix it according to instructions and apply it carefully, making sure it dries completely.
Recycling Pottery Molds: If it’s truly time to retire an old mold, consider using it as a decorative object or creating new shapes from it. Art is all about giving new life!
You won’t just gain new skills from this. You’ll evolve your creativity and build fond memories. Every piece holds a story!
Inspiring Pottery Projects Using Molds
Feeling inspired yet? Let’s get your creative juices flowing with some fun projects that you can tackle using your molds!
Popular Pottery Projects Suited for Molds
As personal as your pottery is, here are some classic projects great for beginners and seasoned potters alike.
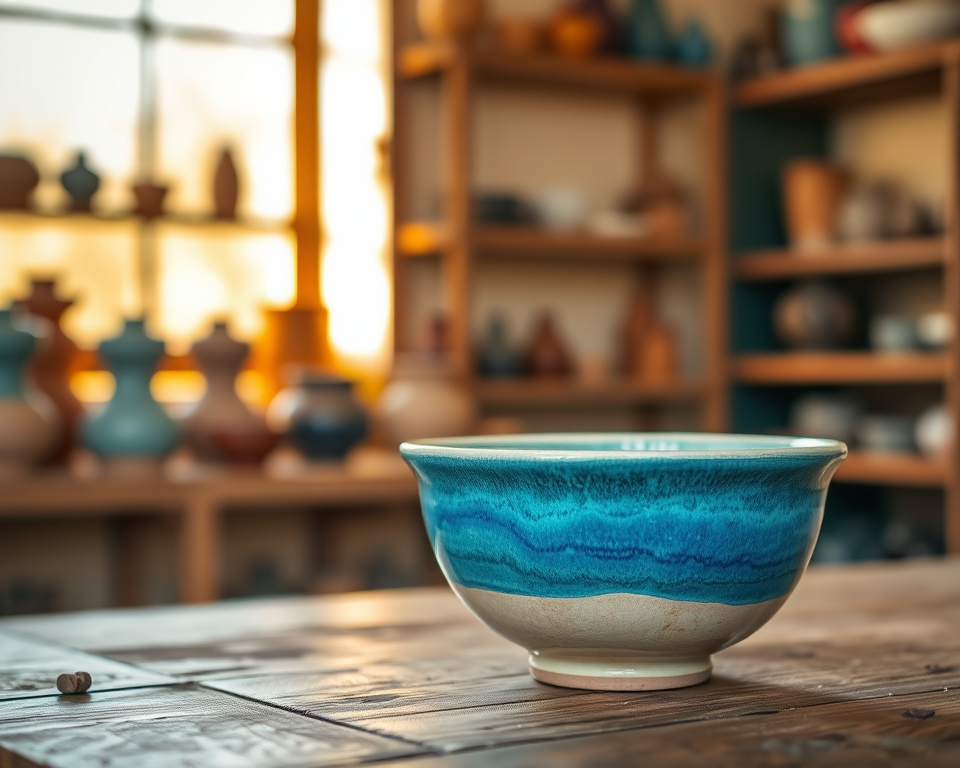
Decorative Bowls: Start with simple shallow molds to create unique bowls. These can be entirely functional or purely artistic pieces—let your imagination lead the way!
Planters: Pottery planters are always a hit. Use molds with drainage holes to create gorgeous vessels for your plant friends.
Wall Art: Get funky! Create tiles using molds, decorate them, and use them in home decor. Talk about an easy way to show off your creativity.
I found that themed or seasonal works fit wonderfully in this category. Think holiday motifs or floral designs. Pottery can serve as a charming backdrop for celebrations, and you can craft items to fit those themes beautifully.
Advanced Techniques for Seasoned Potters
Once you’ve mastered the basics, it’s time to tackle some advanced techniques! Every potter‘s journey evolves, and I love finessing my skills as I go.
Intricate Designs: Experiment with carving surfaces before the clay hardens or try slip trailing for awesome textures. Mixing your colors can make such a difference, too.
Advanced Firing Techniques: Maybe you’d want to learn about saggar firing for intriguing surface effects. Just don’t forget your safety gear!
Mixed Media Pottery: Consider combining clay with other materials. I love integrating found objects or natural elements to add those unique touches.
Pottery is all about journeying and exploring, so never hesitate to experiment!
Community Engagement and Resources
Alright, now we’re wrapping it up with a vital part of your pottery adventure—community engagement.
Joining Pottery Communities for Support
You’re never alone in this artistic endeavor. Online pottery communities are fantastic for sharing experiences, asking questions, and finding inspiration.
Support Groups: Join forums or social media groups where you can post pictures and receive constructive feedback. The Online Pottery Network on Facebook is one I personally recommend!
Collaborate and Learn: Connect with fellow potters! Share tips or arrange local meet-ups for hands-on workshops. It’s an effective way to expand your skill set.
When you truly lean into the community, you garner new knowledge, overcome obstacles, and share so much joy through pottery!
Additional Resources and Learning Opportunities
Don’t forget about resources like online tutorials and classes. They can significantly help you level up your skills. Sites like Skillshare or local workshops can unlock new techniques—all you need to do is stay curious!
Remember, the most valuable resource? Your local ceramics shop! Don’t hesitate to ask for help on materials or techniques; you’ll likely meet seasoned pros there.
“Pottery is about more than just creating; it’s a path of connection, expression, and learning.”
Frequently Asked Questions
What are the best pottery molds for specific projects?
The best pottery molds vary based on the project type. For functional pieces like bowls and cups, sturdy plaster molds are ideal, while silicone molds are excellent for intricate decorative items. It’s essential to consider the final piece’s shape and function when selecting a mold.
How do I make DIY pottery molds at home?
To make DIY pottery molds, you can use materials like modeling clay or plaster. Start by creating a model of your desired object, then encase it in your chosen material to form the mold. After curing, carefully remove the original to leave a cavity for casting.
What type of clay is best to use with different pottery molds?
Different pottery molds may require specific clay types. For plaster molds, casting slips are ideal as they flow into details easily. Silicone molds can work well with air-dry clay, which doesn’t require firing, while flexible molds allow for various clay types without damage.
How can I prevent clay from sticking to pottery molds?
To prevent clay sticking to your molds, apply a mold release agent, like cooking spray or a commercial product before use. Additionally, ensuring the mold is clean and dry can help minimize sticking, reducing the likelihood of damaging your pieces upon removal.
What maintenance tips are essential for preserving pottery molds?
To preserve your pottery molds, regularly clean them with a soft brush or cloth to remove clay residue. Store them in a dry, cool place, avoiding extreme humidity and temperature changes. Consider applying a thin layer of mold release for added protection.
How do I troubleshoot issues with my pottery molds during use?
Common issues include clay sticking, uneven results, or air bubbles. Ensure molds are prepped properly with release agents and examine clay consistency for optimal results. If air bubbles form, tapping the mold gently during casting can help eliminate them.
What are some creative project ideas using pottery molds?
You can create a variety of projects using molds, such as decorative tiles, planters, and serving dishes. Consider themed items for holidays or gifts, like custom ornament molds. Experimenting with colored slips and glazes can also inspire unique designs.
What are the differences between plaster molds and silicone molds?
Plaster molds are rigid and best for detailed shapes but can absorb moisture, requiring careful handling. Silicone molds are flexible and durable, suitable for intricate designs and easier for removing pieces. Each type has its advantages depending on your project needs.
Are there pottery mold alternatives I can consider?
Yes, alternatives to traditional molds include 3D printed molds and handmade papier-mâché forms. Additionally, using natural materials like leaves or stones can create unique textures in your pottery, offering a fresh approach to mold-making.
How can I engage with pottery communities for support?
Engaging with pottery communities can be done through social media groups, online forums, and local classes. Participating in workshops or pottery exhibitions can also provide opportunities to learn from others and gain feedback on your projects and techniques.