Creating pottery glaze isn’t just a craft; it’s an adventure into the world of color, texture, and creativity. If you’re like me, you probably get excited at the thought of transforming a simple piece of clay into something stunning with just the right glaze. Whether you’re a newbie or have some experience under your belt, let’s tackle the pottery glaze-making process together. I promise it’s way less intimidating than it sounds!
Table of Contents
- 1 Understanding the Basics of Pottery Glaze
- 2 The Pottery Glaze-Making Process
- 3 Common Glazing Techniques and Tips
- 4 Safety and Best Practices in Glazing
- 5 Community and Resources for Pottery Glaze Enthusiasts
- 6 Frequently Asked Questions
- 6.1 What are the different types of pottery glazes?
- 6.2 How do I achieve vibrant colors in my pottery glaze?
- 6.3 What is the best way to store homemade pottery glaze?
- 6.4 How can I fix glaze imperfections on finished pottery?
- 6.5 What is the importance of test tiles in glazing?
- 6.6 How does glaze thickness affect the finish and performance?
- 6.7 Are there any natural alternatives to commercial glazes?
- 6.8 What firing methods best suit different types of glazes?
- 6.9 What safety precautions should I take when mixing and applying glaze?
- 6.10 How can I learn more about advanced glazing techniques?
Key Takeaways
- Understanding Glaze: Know what glaze is and how it affects the finished pottery.
- Ingredient Insight: Discover key ingredients that make up a great glaze.
- Step-by-Step Process: Follow a detailed process to mix and apply glaze successfully.
- Techniques and Tips: Explore different glazing techniques and how to troubleshoot common issues.
- Safety Matters: Remember to prioritize safety while working with glaze materials.
Understanding the Basics of Pottery Glaze
Okay, first things first—what is pottery glaze? I remember when I was just starting out, staring at the shelves filled with colorful glazes and having no idea what any of them were.
Pottery glaze is essentially a glassy coating applied to the surface of pottery. It serves multiple purposes, from enhancing the aesthetic appeal with vibrant colors and beautiful textures to protecting the piece from moisture and making it food-safe (which is crucial!). There are tons of types of glaze out there that range from glossy to matte, transparent to opaque, and everything in between.
What is Pottery Glaze?
Let me paint a picture for you. Imagine your favorite dishware—it looks fantastic and has that glossy sheen, right? That surface treatment is the glaze. It’s made from various materials mixed in a precise way to achieve desired results. Not only does it make the pottery visually appealing, but it also provides durability. You can find glazes that reflect light, create depth, or even resist scratches.
Key Ingredients in Pottery Glaze
Now, onto the good stuff—what goes into that magical potion we call glaze? Here’s a quick breakdown of the essential ingredients:
Silica: This is the backbone of any glaze. When heated, it forms glass, giving the glaze its glossy finish. You’ll need about 50-70% of your glaze to be silica.
Feldspar: Acts as a flux, lowering the melting point of silica. It’s crucial for ensuring that our glaze melts properly in the kiln.
Alumina: It helps to stabilize the glaze and create that ceramic feel. So, it’s essential to always include a good amount of alumina for durability.
Coloring Oxides: This is where all the fun happens! Oxides like cobalt, copper, and iron give your glaze its rich hues.
These ingredients work together to create a balance of adhesion, glaze fluidity, and color intensity. Here’s a quick table illustrating the common components and their purposes in glaze formulation:
| Ingredient | Purpose | Typical Percentage |
|---|---|---|
| Silica | Forms glass, gives a glossy finish | 50-70% |
| Feldspar | Lowers melting point, helps glaze adhere | 10-30% |
| Alumina | Stabilizes glaze, improves strength | 5-20% |
| Coloring Oxides | Provides color and aesthetic appeal | 1-10% |
“Each ingredient tells a story in the glaze-making process. Knowing their roles can transform your creations.”
The Pottery Glaze-Making Process
With those basics covered, let’s jump into the nitty-gritty of making your own glaze. Mixing glaze might seem daunting, but once you’ve got the hang of it, it feels like cooking up a delicious recipe. Just like whipping up a killer pasta sauce, you can experiment with proportions to find the perfect blend!
Step-by-Step Guide to Making Pottery Glaze
Gather Your Materials: Here’s what you’ll need:
- Scale for measuring
- Mixing container (like a bucket or a glass bowl)
- Drill with a mixing paddle (to avoid lumpiness)
- Sieve (to eliminate larger particles)
- Safety glasses and mask (trust me, safety first)
Measuring Ingredients: Let’s start with a basic recipe! In a standard batch, try this:
- 50% silica
- 25% feldspar
- 15% alumina
- 10% coloring oxides (adjust based on color intensity desired)
Measure out your ingredients accurately. This is key! Too much of one thing can throw the whole batch off.
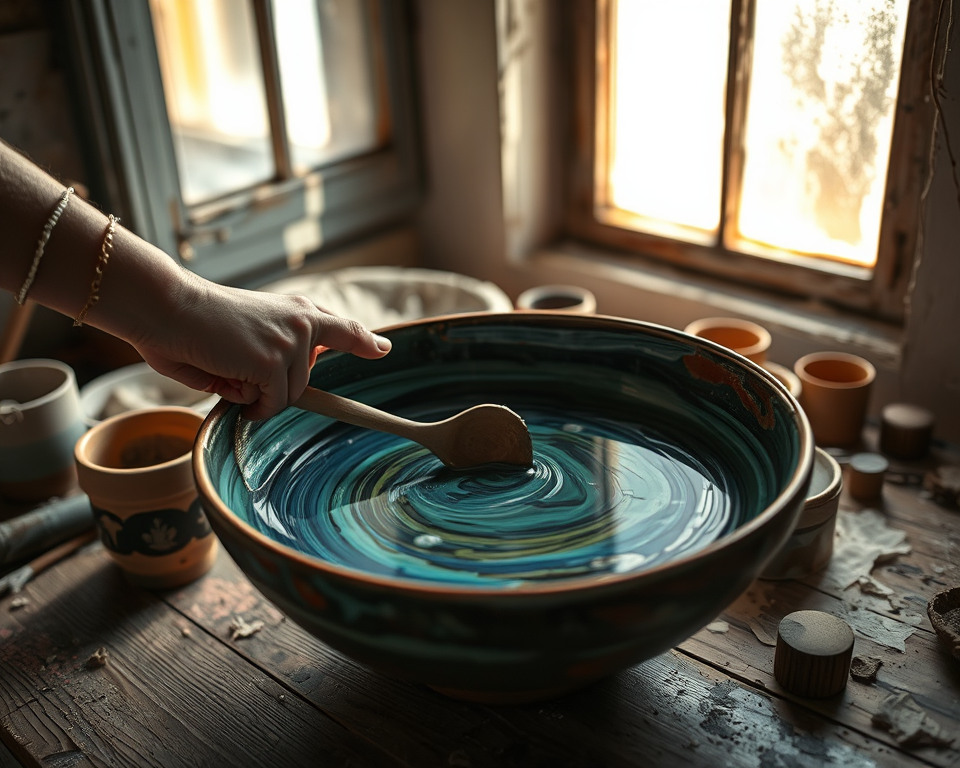
Mixing: Combine all the dry ingredients in a container. Slowly add water while mixing with the paddle—don’t go dumping it all in at once. Think of it as a delicate dance of consistency. You’ll want a creamy texture, kind of like pancake batter, but a bit thicker.
Sifting: This is a crucial step. Sift your mixture through a sieve to eliminate any lumps. The smoother your glaze, the better it’ll apply to your pottery.
Testing Consistency: Dip a testing piece of bisque pottery into the glaze. If the glaze runs off, it’s too thin; if it’s hard to apply, add more water until you achieve a nice, workable consistency.
Stir it up until you’re confident; then you’re good to go!
Ensuring Proper Consistency and Texture
When I first started glazing, I remember struggling to get the consistency just right. It can be frustrating. A glaze that’s too thick will end up being clumpy, while a glaze that’s too thin might just slide off your piece like water off a duck’s back.
To achieve that perfect glaze consistency, here are some tips:
Check Viscosity: You’re aiming for a texture that smooths out easily on your pottery piece but isn’t runny. A good test is to dip your finger into the glaze; if it coats it lightly without dripping, you’re on the right track.
Adjust as Needed: If your mixture is too thick, add a little water gradually. On the flip side, if it’s too thin, you might need to add a touch more dry ingredients.
“Remember, practice makes perfect! Experimenting with different consistencies is part of the fun of glazing.”
Common Glazing Techniques and Tips
Now that we have our glaze prepared, let’s jump into some exciting glazing techniques. When I first started, I was overwhelmed by the variety available, but I found my favorites through trial and error.
Popular Glazing Techniques Explained
Brush-On Glaze: This technique is perfect for detail work. Grab a decent-quality brush (the Princeton Velvetouch series is my go-to, around $10-15) and apply the glaze to your piece. Make sure you cover the desired area evenly. Just be mindful of brush strokes; we want an aesthetically pleasing finish!
Dipping Glaze: It’s like giving your pottery a quick bath! This method is fast and gives you a nice, even coat. Just make sure to dip your piece smoothly and allow excess glaze to drip off.
Spray Glaze: If you really want to kick things up a notch, consider spray glazing. The Duncan EZ-4760 airbrush kit, priced around $50, is fantastic for creating iridescent effects and achieving smooth finish. Just remember to wear a mask when you do this!
Layering Glazes: One of my favorites! Applying multiple layers of different glazes creates unique effects. You’ll want to let each layer dry before adding another to avoid unexpected reactions.
Troubleshooting Common Glazing Mistakes
Let’s face it—glazing can be challenging, and we’ve all had those moments where it doesn’t go as planned. I’ve definitely learned some tough lessons, but here are some common glazing problems and how to fix them:
Glaze Imperfections: If you notice bubbling or an uneven surface, this can often be due to air bubbles caught in the glaze. Make sure to stir slowly while mixing to avoid incorporating too much air.
Cracking: This usually occurs if the glaze was too thick or if it was applied on a piece that wasn’t fully dried. Always ensure your work is bone dry before glazing!
Color Variations: Ever ended up with a color that’s far from what you expected? This often happens with different kilns and firing temperatures. Keep notes on what you used, and don’t hesitate to adjust ingredients or firing temps on your next attempt.
“Mistakes are just stepping stones to your next masterpiece. Every experienced potter has faced their fair share of glazing disasters!”
Safety and Best Practices in Glazing
Alright, let’s switch gears for a bit. While glazing is a blast, it’s super important to prioritize safety when working with these materials. Some glazes can contain harmful ingredients—better safe than sorry!
Essential Safety Gear and Precautions
Whenever I’m glazing, you’ll find me decked out in my safety gear. Here’s what I recommend:
Protective Gloves: Invest in a decent pair of nitrile gloves (available for about $10). They’ll keep your hands safe from any harsh chemicals.
Respirator Mask: A basic mask will do, but I’d suggest getting a quality respirator—around $30-50. You want to keep those harmful dust particles out of your lungs!
Safety Goggles: Your eyes are precious! Grab some goggles, usually around $5-10.
Best Practices for Glazing Success
To maximize your glazing results, you’ll want to keep these tips in mind:
Prep Your Workspace: Clear off a solid area to work. I like to set up a dedicated glazing station, so I have all my tools and materials within reach.
Clean Your Tools: Before diving into your next batch, ensure all your brushes, mixing paddles, and containers are ultra-clean. Trust me, residual glazes will ruin your next masterpiece!
Take Notes: Keep a dedicated glazing journal or Pinterest board! Document your glaze mixes, colors used, and techniques applied so you can replicate your successes.
Community and Resources for Pottery Glaze Enthusiasts
Lastly, let’s talk about the community surrounding pottery glazing. Every time I meet another potter, I learn something new. Engaging with others not only enhances your skills but also sparks creativity.
Connecting with Other Pottery Enthusiasts
One of the best parts of this journey is the connections I’ve made with other glaze enthusiasts. Whether through online forums, local classes, or community workshops, there’s a world of support out there! Here are a few places to start:
Online Pottery Communities: Websites such as Pottery Heads and Ceramic Arts Daily host forums where you can ask questions or share your work.
Social Media Groups: Check out Facebook groups focused on pottery and glazing. The camaraderie and tips shared are invaluable.
Finding Inspiration and New Techniques
There’s always something new to learn in pottery! Some resources that have inspired me over the years include:
YouTube Tutorials: Channels like The Clayteacher and Hayley’s Pottery are excellent for visual learners. I often binge-watch their videos to gather fresh ideas!
Local Art Galleries: Visit exhibitions to see what other artists are doing. You might stumble upon a new technique or glaze style that catches your eye.
By connecting with like-minded folks, you’ll find that support and inspiration can take your glazing game to the next level! So don’t hesitate to share your creations and learn from those around you.
And there you have it—a deep dive into the world of pottery glaze-making! Get elbow-deep in clay, and don’t be afraid to experiment with your glazes. With practice, patience, and a supportive community, you’ll be creating stunning pieces in no time. Happy glazing!
Frequently Asked Questions
What are the different types of pottery glazes?
There are several types of pottery glazes, each offering unique aesthetics and qualities. Common types include glossy, matte, transparent, opaque, and satin. Specialty glazes like crackle, shino, and celadon also exist, each providing distinct visual effects and textures.
How do I achieve vibrant colors in my pottery glaze?
To achieve vibrant colors, pay attention to the choice and concentration of coloring oxides. Experiment with layering different glazes and try underglazes for detailed designs. Firing temperature can also impact color; higher temperatures often enhance vibrancy.
What is the best way to store homemade pottery glaze?
Homemade pottery glazes should be stored in airtight containers to prevent settling and drying. Label each container with the glaze composition and date, and store in a cool, dry place to maintain stability and usability.
How can I fix glaze imperfections on finished pottery?
Common glaze imperfections like bubbling or crazing can sometimes be fixed by sanding down the affected area and reapplying glaze. Ensure you adjust your firing temperature or glaze formulation to avoid repeating the mistake in future projects.
What is the importance of test tiles in glazing?
Creating test tiles is crucial for understanding how a glaze will behave when fired. It allows you to see the final color, texture, and potential interactions with other glazes before applying them to larger pieces, saving time and materials.
How does glaze thickness affect the finish and performance?
Glaze thickness significantly influences the final look and durability. A thicker glaze may run or create drips, while too thin a coating may lead to inadequate coverage or dull appearance. Aim for a thickness of about 1/16 inch for optimal results.
Are there any natural alternatives to commercial glazes?
Yes, natural alternatives include using clay slips or ash glazes made from wood ash. These methods can impart unique textures and colors, but may require more experimentation for desired results compared to commercial options.
What firing methods best suit different types of glazes?
Different firing methods, such as cone firing, pit firing, or raku, can profoundly impact glaze appearance. Understanding how your chosen glaze reacts to various firing environments helps in selecting the appropriate technique for your artwork.
What safety precautions should I take when mixing and applying glaze?
Safety is paramount in pottery glazing. Always wear protective gear, including gloves and masks, and ensure proper ventilation in your workspace. Familiarize yourself with the ingredients in your glaze to avoid harmful chemical exposure.
How can I learn more about advanced glazing techniques?
To explore advanced glazing techniques, consider enrolling in workshops, participating in online classes, or joining local pottery groups. This hands-on experience and community engagement can provide invaluable insights and inspiration for your glazing projects.