Pottery might seem like one of those crafts where you either have it or you don’t, but trust me, with the right tools and a sprinkle of creativity, anyone can master underglaze techniques! Picture this: your ceramic pieces glowing with vibrant colors and intricate designs, each stroke of underglaze enhancing its artistic flair. Sounds appealing, right? It absolutely can be! Whether you’re just starting or have a few pots under your belt, I’m here to help you take that leap into the beautiful world of underglazing.
Table of Contents
- 1 Key Takeaways
- 2 Techniques for Applying Underglaze
- 3 Enhancing Your Artistry with Underglaze
- 4 Drying and Firing Underglaze
- 5 Engaging with the Pottery Community
- 6 Frequently Asked Questions
- 6.1 What is the best way to prepare my pottery surface before applying underglaze?
- 6.2 Can I mix different brands of underglaze?
- 6.3 How can I achieve unique patterns and effects with underglaze?
- 6.4 What are the common firing temperatures for underglaze?
- 6.5 How long should I let underglaze dry before firing?
- 6.6 What maintenance is required for underglaze pottery?
- 6.7 How do I avoid common mistakes when applying underglaze?
- 6.8 What should I do if my underglaze is not adhering properly?
- 6.9 How can I get feedback on my pottery work from the community?
Key Takeaways
- Preparation is key: Clean and prepare your pottery properly to ensure your underglaze adheres perfectly.
- Choose the right tools: Invest in quality underglaze brushes and sponges for better application and results.
- Layering enhances beauty: Don’t be afraid to experiment with layering underglazes for stunning effects.
- Master your firing skills: Knowing how to dry and fire your pieces correctly can be the difference between beautiful pottery and a muddy disappointment.
- Join the community: Sharing your experiences fosters creativity and offers invaluable feedback from fellow potters.
Techniques for Applying Underglaze
Now that we’ve set the stage, let’s plunge into the first technique: applying that underglaze like a pro. The key here is not just in how you apply it, but also in how you prepare for it.
Preparing Your Pottery for Underglaze
Before you grab that underglaze bottle, take a moment to prepare your canvas – or, in this case, your pottery. This is about ensuring the surface is clean and ready to take on color.
Step one, cleaning pottery. I recommend using a soft sponge and some warm water to eliminate any dust or debris. You don’t want grime getting in the way of your masterpiece! If you’re working with bisque ware, that surface may have a lot of tiny holes. For a smoother application, you might want to consider buffing it lightly with some fine-grit sandpaper, giving you an excellent, clean surface to work on.
Speaking of surfaces, make sure your pottery is adequately dried. If you’re working from leather-hard clay, it should be just the right texture – not too wet, but still soft enough for the underglaze to adhere. Waiting for it to dry can feel like watching paint dry, but trust me, it’s worth it!
“It’s all in the prep work — a clean surface is like a blank canvas. The better your foundation, the more stunning your piece will be.”
Tools Needed for Underglaze Application
Now that your pottery is prepped and primed, it’s time to talk tools. The right tools can make all the difference in achieving the desired effects with your underglaze.
Underglaze Brushes: A good set of brushes is non-negotiable. I love using the Robert Simmons White Sable Brushes – they offer precision and control (usually around $15 each). The fine-tipped ones are perfect for detailing, while the larger ones work wonders for broad strokes.
Underglaze Sponges: For softer texture applications, underglaze sponges are fabulous. I recommend using the KFS Craft Sponges, which come in a variety of shapes and sizes (at about $10 for a set). These sponges are great for dabbing and can create various textures when applying your colors.
Applicator Tools: Sometimes, a simple squeeze bottle can do wonders for that fine, controlled application (I especially love the PME Squeeze Bottle for $7). It allows for precision pouring, ideal for detailed decorative work.
Remember, the tools you choose should feel comfortable in your hand. You wouldn’t want to be distracted with sore fingers when you’re in the zone!
Step-by-Step Underglaze Application Process
So, you’re ready to start applying underglaze? Let’s break it down step by step.
Choose Your Colors: Pick a palette that speaks to you. I suggest starting with a primary color and a secondary color for some contrast. Brands like Amaco and Duncan come with a fantastic range of colors that are vibrant and mix well for a range of effects.
First Layer: Using your brush, apply an even first layer of underglaze. Don’t overload the brush; it can drip. Trust me, dripping can be detrimental to your art! A neat and thin layer is what you want.
Drying Time: Allow each layer to dry completely. You can speed up the process with a heat gun, but don’t overdo it. That might crack your pottery, and nobody wants that.
Layering Technique: Once your base layer is dry, feel free to go on with additional layers. Here’s a pro tip: if you want to create depth, mix colors! You can use a dry brush technique or a layering technique to achieve some amazing blends.
Final Touches: Don’t forget to add your final details. Use the finer brushes for any intricate designs or patterns.
Final Drying: Once you’ve achieved the look you want, let it dry for a good while before firing.
“Layering is where the magic happens. Don’t settle for one coat; play around with colors and textures until you’ve got something that makes your heart race!”
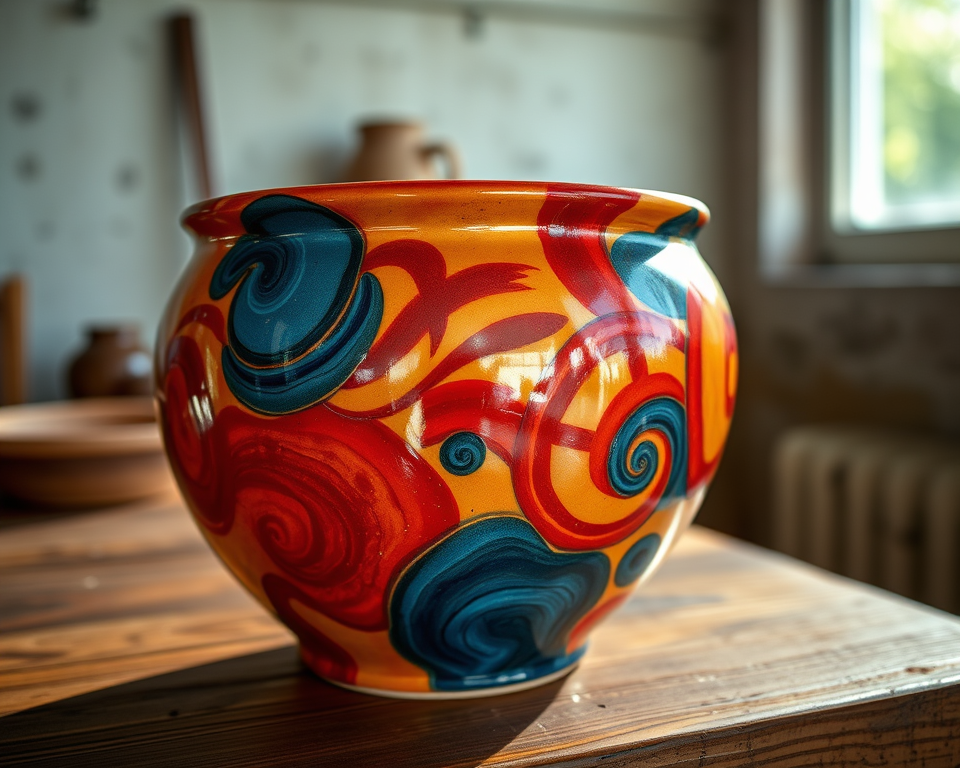
Enhancing Your Artistry with Underglaze
Now that you’ve got the technique down, how do you elevate your artistry? Let’s dive into creativity!
Creative Techniques and Effects
The sky’s the limit here with how you can apply underglaze. Texture can elevate your piece from basic to extraordinary. Think outside the box:
Sgraffito: This involves applying a layer of underglaze and then scratching through it to reveal the clay beneath. I find that this technique works great on darker clays, giving a beautiful contrast.
Resist Techniques: Use wax to create designs, then apply underglaze over it. Once fired, the wax will burn off, leaving clever little designs behind!
Stencils: I’ve had success using stencils by placing them on my pottery and dabbing the underglaze on, creating fun patterns. You can buy pre-made stencils or make your own using a thick plastic sheet.
Experimenting with color blending is another way to enhance your pieces. Mixing colors directly on your pottery can create a beautiful watercolor effect that is stunning yet simple to create.
| Technique | Description | Best For |
|---|---|---|
| Sgraffito | Scratching designs through a layer of underglaze. | Detailed designs |
| Resist | Using wax to block out areas before glazing. | Creating unique patterns |
| Stenciling | Applying underglaze with stencils for patterns. | Quick patterns and shapes |
Common Mistakes in Underglaze Application
Everyone makes mistakes, even pros, so don’t sweat it! Here’s what to watch out for to keep your pottery from turning into a splotchy mess.
Too Thick: Applying underglaze too thick can lead to cracks. Keep it light and airy for better results.
Skipping Drying Times: I get it; waiting feels tedious. But skipping this step can lead to smudging or worse, colors blending in ways you didn’t intend.
Poor Quality Products: Investing in low-quality underglazes can result in dull colors. Brands like Mayco or Amaco help achieve depth and vibrancy, so choose wisely!
If you find yourself dealing with issues, take a breath and assess the situation. Adjusting your layers or switching your tools can make a significant difference.
“Mistakes are just part of the journey. Embrace them, learn, and keep moving forward!”
Drying and Firing Underglaze
Now, let’s chat about drying and firing – two integral steps to mastering underglaze application.
Tips for Successful Firing
Firing your pottery isn’t just flipping a switch; it’s about timing and technique. First and foremost, every kiln is different, so get to know yours.
Drying Times for Underglaze: After your application, let your pottery dry for at least 24 hours before placing it in the kiln. Feeling impatient? Resist the urge to rush it and use a heat gun to speed up the drying time, but take care – don’t overheat one area; that could result in cracks.
Firing Temperatures for Underglaze: Check the specifications on your underglaze – many require a cone 04 firing, usually around 1940°F. Make sure to check and adjust according to your specific kiln’s requirements and your underglaze’s characteristics.
Best Practices for Firing Ceramics: Pay attention to ramp times in your kiln, especially if you’re working with intricate pieces that may be sensitive. A slow ramp up helps reduce thermal shock and cracks.
A well-fired piece should emerge from the kiln looking precisely like the piece you envisioned, vibrant and alive in color!
Maintaining Quality of Underglaze Work
Now that you’ve created beautiful pottery with underglaze, let’s talk about maintenance. Everyone wants their creations to last, right?
Protecting Your Work: Once fired, avoid exposing your pottery to extreme temperatures or shocks. Use it for decorative purposes or ensure gentle handling for functional pieces.
Caring for Glazed Pottery: Wash your pots by hand instead of throwing them in the dishwasher. The heat and pressure can cause unwanted chips or scratches.
Determining how to care for your underglazed pieces can significantly extend their lifespan while maintaining their beauty and integrity.
“Your pottery is an extension of yourself; treat it with the care it deserves, and it will serve you beautifully.”
Engaging with the Pottery Community
Pottery isn’t just a solitary art – it’s a community! Engaging with other craft enthusiasts can exponentially enhance your skills and creativity.
User-Generated Insights and Experiences
Sharing your experiences in the world of pottery opens so many doors for learning. Be it through forums, social media groups, or local pottery clubs, each connection can lead to new insights.
Sharing techniques and showcasing your progress can give you an incredible perspective on your journey. I remember the first time I posted a photo of my piece – the feedback and encouragement I received were beyond uplifting!
Seeking Feedback and Improvement
I can’t stress enough the importance of feedback. Constructive criticism can take you from beginner-level to pro in no time. Getting peer reviews or joining pottery critique groups provides a fresh pair of eyes on your work.
Use platforms like Instagram or dedicated pottery groups on Facebook to share photos of your work, then ask for input. You’ll be surprised how many seasoned potters are willing to share their thoughts and advice!
Joining the pottery community is not just about improving your craft; it’s about belonging. Sharing struggles and triumphs foster relationships that go beyond artistic boundaries.
“The beauty of pottery lies not just in the creation but in the shared experiences and support from fellow potters. It’s like having a team rooting for your artistic journey.”
Continuing to experiment with underglaze, connecting with others, and continually refining your technique will certainly bring a sense of joy and accomplishment. Remember, every pot you create is a step towards mastery!
Frequently Asked Questions
What is the best way to prepare my pottery surface before applying underglaze?
Preparing your pottery surface involves cleaning it thoroughly to remove any dust or debris. Once clean, consider refining the surface with a damp sponge to create a smooth texture. Additionally, let your pottery dry completely to avoid moisture interference with the underglaze application.
Can I mix different brands of underglaze?
While it is possible to mix different brands of underglaze, it’s essential to test a small sample first. Different brands may have varying compositions that can affect adhesion, drying time, and firing outcomes. Always do a test piece to avoid unexpected results.
How can I achieve unique patterns and effects with underglaze?
Experimenting with layering, wet-on-wet techniques, and using different application tools can create unique patterns and effects. Try sponging, splattering, or using stencils to add creativity to your designs. Don’t hesitate to mix colors for custom shades and effects.
What are the common firing temperatures for underglaze?
The firing temperature for underglaze typically ranges from cone 04 (approximately 1940°F or 1060°C) to cone 6 (approximately 2232°F or 1222°C), depending on the clay body and glaze used. Always refer to the manufacturer’s specifications for precise firing temperatures.
How long should I let underglaze dry before firing?
Generally, underglaze needs to dry thoroughly for 24 hours at room temperature before firing. This drying time can vary based on humidity and thickness of the application. Ensure there are no moist areas before placing your pottery in the kiln to avoid defects.
What maintenance is required for underglaze pottery?
Under-glazed pottery should be handled gently to prevent scratches. Clean it with mild soap and soft cloths, avoiding harsh chemicals. To prolong durability, store your pieces in a safe area, following proper care tips to keep colors vibrant and intact.
How do I avoid common mistakes when applying underglaze?
To avoid common mistakes, ensure your pottery is clean and dry, apply even coats, and let each layer dry before adding more. Use appropriate tools and techniques, and familiarize yourself with your chosen underglaze’s specific characteristics through practice.
What should I do if my underglaze is not adhering properly?
If your underglaze isn’t adhering, check the surface cleanliness and dryness. You may need to adjust your application method or consider the type of clay body being used. Testing on a small piece or switching to a different underglaze may also help rectify adhesion issues.
How can I get feedback on my pottery work from the community?
You can seek feedback through online pottery forums, social media groups focused on ceramics, or local pottery clubs. Share images of your work, ask specific questions, and engage with other potters to gain constructive criticism and valuable insights.