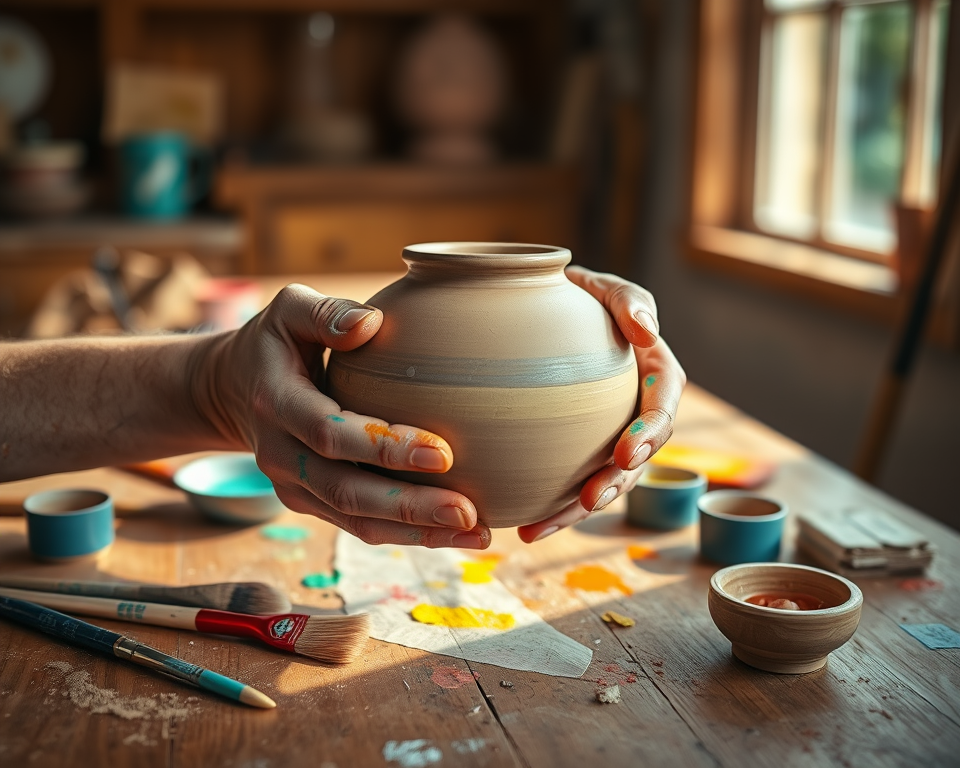
It’s that moment when you’re staring at a blank piece of pottery, feeling that creative spark ignite. Maybe it was your mom’s old ceramic trinkets that made you want to give pottery painting a shot, or perhaps you fancy whipping up some custom gifts for your friends. Whatever the reason, today is the perfect day to channel your inner artist and dive into the world of pottery painting. Trust me; it’s not only fun but incredibly rewarding!
Table of Contents
- 1 Key Takeaways
- 2 Techniques and Materials for Pottery Painting
- 3 Step-by-Step Guide to Painting Pottery
- 4 Inspiring Designs and Ideas for Pottery Painting
- 5 Common Mistakes and Troubleshooting Pottery Painting
- 6 Health and Safety Considerations in Pottery Painting
- 7 Frequently Asked Questions
- 7.1 What are the different finishes available for pottery after painting?
- 7.2 How can I ensure the longevity of my pottery paint?
- 7.3 Are there specific techniques for painting intricate designs on pottery?
- 7.4 What should I do if my paint bubbles or peels on the pottery surface?
- 7.5 Can I use regular acrylic paint for pottery, or do I need special paints?
- 7.6 How can I create texture on painted pottery?
- 7.7 What are some eco-friendly options for pottery painting supplies?
- 7.8 How should I store my pottery paints and tools?
- 7.9 What are some common beginner mistakes to avoid in pottery painting?
- 7.10 Is there a recommended drying time for pottery paints?
Key Takeaways
- Choosing the right paint is crucial. Look for non-toxic and food-safe options for your projects.
- Prep work is half the battle—clean your pottery well to ensure the paint sticks!
- Don’t stress over mistakes. They’re excellent opportunities to learn and improve your skills.
- Keep an open mind when seeking inspiration; creativity often comes from unexpected places!
Techniques and Materials for Pottery Painting
First things first, let’s chat about materials. You wouldn’t cook without the right ingredients, right? Same goes for-painting pottery!
Choosing the Right Pottery Paint
The paint you choose determines everything from how your piece looks to how durable it will be. I’ve found that some paints really stand out for pottery painting. Here’s my go-to list:
Acrylic Paints: These are versatile and easy to use. Brands like Apple Barrel and FolkArt offer tons of colors (about $1-$2 per bottle). Just ensure they’re labeled for ceramics—this means they’ll hold up better over time.
Ceramic Underglaze: If you’re looking for a professional finish, this is where it’s at. It’s developed specifically for ceramics and fire-safe. Brands such as Mayco provide a great range and usually run between $6-$15 depending on the size.
Glaze Paint: If you want a glossy finish, glaze paints are your friend. They need to be heat-set in a kiln but give that beautiful shiny surface we all love. Look for brands like Amaco, where prices can vary from $10 to $30, depending on the type.
Recommended Tools and Supplies
Now that you’ve picked your paint, what about the tools? You’ll need a few essentials to get rolling.
Pottery Brushes: You’re gonna want a range of brushes, from fine detail brushes to larger ones for broader coverage. I like using the Simply Simmons brand—high quality, low cost, typically around $12 for a set.
Mixing Palettes: A basic plastic one will do just fine for mixing colors, which can be found at any craft store for about $5.
Sealants: After you’ve painted your masterpiece, a clear acrylic sealer like Krylon Clear Spray (around $8) can help protect it.
Remember, having the right tools will save you a ton of frustration and ensure your painting experience is smooth sailing.
Step-by-Step Guide to Painting Pottery
Feeling ready? Let’s break it down step by step so nobody feels lost.
Preparing Your Pottery for Painting
If you start painting on a dirty or greasy surface, expect a headache down the road. Here’s how to prep:
Clean the Surface: Use warm, soapy water to scrub your pottery, removing any dust or grime. Rinse thoroughly with clean water.
Dry Completely: Don’t rush this bit! Let it dry completely before you even think about starting your design.
Prime if Necessary: If your surface is glossy, you might consider a base coat of acrylic paint to help the colors adhere better.
Applying Techniques for Painting Pottery
Now the fun part! Let’s jump into some painting techniques!
Painter’s Tape Technique: Need straight lines? Tape off sections before painting to keep things neat.
Layering Paint: Don’t be afraid to build up layers. Start with lighter colors and add darker tones. This creates depth and interest.
Sponging Effects: Use a sponge to add texture. Just dab the sponge in paint and lightly tap it onto the pottery. This gives a cool, aged look.
I’d say my favorite technique is using stencils. They make it so easy to get detailed designs! Simply lay them down, and apply the paint over. The Mod Podge Stencil sets are fantastic and easy to use.
Inspiring Designs and Ideas for Pottery Painting
Feeling overwhelmed by choices? No worries! Let me share some fun ideas to light that creative fire.
Seasonal and Themed Pottery Projects
Ever thought about seasonal themes? They’re a blast! Imagine decorating your home with pottery that celebrates the spirit of each season. Here are a few thoughts:
For holidays, you could paint festive scenes on mugs or plates—think turkey for Thanksgiving or snowflakes for winter.
Summer projects could include bright flowers or beach themes on bowls or vases.
If you’re feeling ambitious, why not explore cultural pottery styles? Research different cultures’ artistic expressions and incorporate those elements into your pieces.
Collecting Visual Inspiration
Sometimes, we need a bit of a nudge to spark creativity. Social media is a treasure trove for pottery art. I often scroll through platforms like Pinterest or Instagram looking for ideas.
Check out these accounts for some serious inspiration:
– @thelittlepottery: Offers stunning ceramic art that captures nature’s beauty.
– @georgiapottery: Inspiring designs tailored for home décor.
Here’s a quick table to summarize those sources of inspiration:
| Platform | Type of Inspiration | Example Account |
|---|---|---|
| DIY ideas and visuals | N/A | |
| Contemporary pottery artists | @thelittlepottery | |
| YouTube | Tutorials and tricks | N/A |
Common Mistakes and Troubleshooting Pottery Painting
Let’s be real: we all mess up sometimes. Don’t let that get you down—let’s troubleshoot those pesky problems together!
Addressing Issues with Paint Application
We’ve all been there—bubbles, smudges, or uneven paint. The good news is these can often be fixed:
Paint Bubbling: This often happens from applying it too thickly or using a paint that dries too fast. Solution? Thin it out or let it dry before adding more layers.
Uneven Coverage: A super common issue! Make sure to use enough paint and apply in thin coats. Always brush in the same direction.
Paint Chipping: If your paint is chipping, you might not have used a sealant or the right kind of paint. Opt for a quality sealant like Mod Podge Outdoor (around $10).
Remember, mistakes mean you’re learning! Embrace them.
Tips for Avoiding Beginner Mistakes
The difference between a novice and a seasoned painter lies in those simple techniques. Here’s some advice to help the newbies shine:
Practice on Paper First: Before diving onto that pottery, paint on paper to sketch your designs. Trust me, it’ll save you the heartache!
Stay Steady: A stable hand is essential. Use your non-painting hand to support your elbow for extra stability.
Use Less Paint at First: It’s better to go lighter than to overdo it and risk mistakes. You can always build up!
“Every mistake you make is just a step towards your next masterpiece. Embrace the journey!”
Health and Safety Considerations in Pottery Painting
While getting crafty is awesome, we gotta stay safe, right? There are a couple of health precautions that will keep your pottery fun and enjoyable.
Selecting Environmentally Friendly Options
Going green is the name of the game. Here are some potting supplies that are kinder to the planet:
Natural Materials: Look for clay and glazes that are labeled as sustainable. Brands like Sculpey are known for their eco-friendly products.
Biodegradable Paints: Try using non-toxic water-based acrylics or natural pigments. Just look for labels stating they’re environmentally friendly.
Recyclable Tools: When picking up brushes and palettes, opt for biodegradable or recycled options for a lower carbon footprint.
Ensuring Safe Usage of Pottery Supplies
Now, about safe crafting: always read labels closely. Many paint products will have important safety instructions. And don’t skip out on ventilation—open a window or use a fan when painting, especially with sprays or glazes.
Handling Paints: Always use gloves if you’re sensitive. Paints can sometimes irritate skin.
Storage: Keep your paints sealed and stored in a cool, dry place to maintain their quality.
“A little care goes a long way! Safety isn’t just a precaution; it’s a part of your creative process.”
And there you have it! You’re now equipped with an arsenal of pottery painting tips, tricks, and techniques to kickstart your creative journey. Remember, pottery painting is all about expressing yourself, so don’t hold back. Embrace the excitement, let your personality shine through your designs, and enjoy the process! ✨
Frequently Asked Questions
What are the different finishes available for pottery after painting?
Pottery finishes can vary widely, including glossy, matte, satin, or textured. Each finish gives a different aesthetic and feel to the piece. Glossy finishes are often used for vibrant colors, while matte finishes can offer a more subdued look. Consider experimenting with various glazes for unique effects.
How can I ensure the longevity of my pottery paint?
To ensure your pottery paint lasts, choose a high-quality, food-safe paint and apply a sealant after painting. Avoid harsh cleaning agents; instead, hand wash gently with mild soap to prevent damage. Properly storing your pottery in a safe location away from direct sunlight can also prolong its lifespan.
Are there specific techniques for painting intricate designs on pottery?
Yes! Use techniques like stenciling or using fine-tipped brushes for detailed designs. You can also try the sgraffito technique, where you scratch through a painted surface to create patterns. Practice on a test piece before applying complex designs to your final pottery project.
What should I do if my paint bubbles or peels on the pottery surface?
If paint bubbles or peels, it may be due to moisture trapped beneath the paint or incorrect paint compatibility. To resolve this, strip off the old paint, clean the surface thoroughly, and ensure the pottery is completely dry before repainting. Apply thin layers of paint to minimize bubbling.
Can I use regular acrylic paint for pottery, or do I need special paints?
Regular acrylic paint can be used for decorative purposes, but for items that will hold food or liquids, it’s essential to use food-safe pottery paint or glazes. Always check the manufacturer’s labels to ensure safety and appropriate usage for your pottery applications.
How can I create texture on painted pottery?
To add texture to your pottery, consider using sponges, brushes for different stroke effects, or even natural materials like leaves for impressions. Layering different colors and working with thick application methods can also help achieve a textured appearance.
What are some eco-friendly options for pottery painting supplies?
Eco-friendly options include non-toxic, water-based paints and biodegradable sealants. You can also look for pottery clays and glazes made from natural materials that are sustainably sourced. Always check product labels for certifications regarding environmental safety.
How should I store my pottery paints and tools?
Store pottery paints in a cool, dry place away from direct sunlight to prevent them from drying out or degrading. Be sure to close containers tightly after use. For tools, keep brushes and applicators clean after use and store them upright in a container to preserve their shape.
What are some common beginner mistakes to avoid in pottery painting?
Beginners often make errors such as not properly cleaning the surface before painting, applying too thick layers of paint, or failing to allow adequate drying time between coats. It’s essential to follow the preparation guidelines and take your time to achieve the best results.
Is there a recommended drying time for pottery paints?
Drying times can vary based on the paint type and environmental conditions. Generally, acrylic paints can dry within a few hours, while glaze paints may take longer and often require kiln firing. Always refer to the specific product instructions to ensure optimal results.