
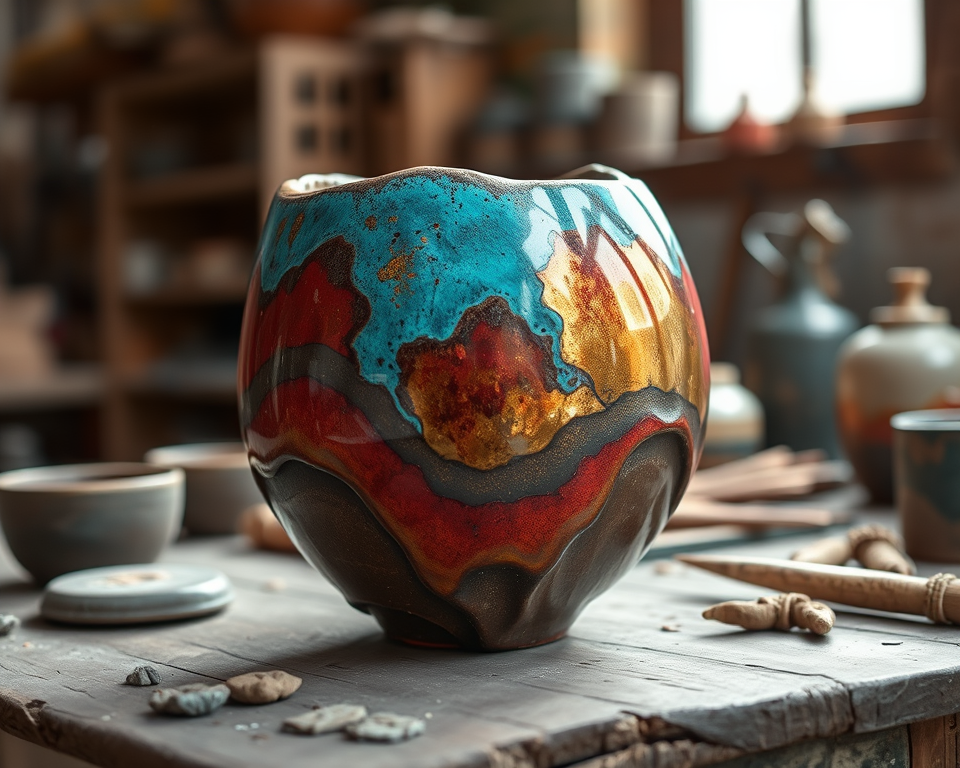
When it comes to Raku pottery, the thrill of creating beautiful, one-of-a-kind pieces has a magnetic pull. If you’re anything like me, you love the excitement of making art with your own two hands and glazing it with rich colors that pop like fireworks. But let me tell you—getting into Raku isn’t just about throwing some clay on a wheel. It requires the right materials, techniques, and a dash of daring. So buckle up; we’re about to explore Raku pottery together!
Table of Contents
- 1 Key Takeaways
- 2 Materials Needed for Raku Pottery
- 3 Techniques for Creating Raku Pottery
- 4 Glazing Methods for Raku Pottery
- 5 Frequently Asked Questions
- 5.1 What is the difference between Raku clay and traditional pottery clay?
- 5.2 How do I choose the right kiln for Raku pottery?
- 5.3 What are some safety precautions I should take when firing Raku pottery?
- 5.4 Can I use regular glazes for Raku pottery?
- 5.5 What common mistakes should I avoid when applying glazes to Raku pottery?
- 5.6 How can I achieve unique effects with Raku glazing?
- 5.7 What are some advanced techniques I can use in Raku pottery?
- 5.8 How can I prevent cracks in my Raku pottery during the firing process?
- 5.9 What historical influences helped shape Raku pottery?
- 5.10 Are there any innovative techniques currently trending in Raku pottery?
Key Takeaways
- Raku pottery is all about unique glazing techniques and the firing process that creates dramatic effects.
- You’ll need specific materials, including Raku clay, glazes, and essential pottery tools to get started.
- Safety precautions are crucial since working with a kiln involves heat and fumes.
- Understanding the cultural significance of Raku can deepen your appreciation for this art form.
- Don’t get discouraged by mistakes! Troubleshooting common issues is part of the process.
Materials Needed for Raku Pottery
Starting with the right materials is crucial in your Raku journey. Think of it like building a sturdy foundation for a house—you wouldn’t skimp on the basics. Here’s a breakdown of what you’ll need for Raku pottery.
Overview of Required Materials
To kick things off, you’ll need the proper clay. I personally recommend Raku clay, like the Laguna Raku Clay, which usually costs around $25 for 25 lbs. It has a fine texture and holds up well during the firing process. You’ll also want a potter’s wheel if you plan to throw your pieces. The Shimpo VL-Lite is lightweight, portable, and priced around $795. Perfect for both newbies and seasoned potters.
When it comes to glazes, I find that using Amaco Raku Glazes works wonders. They’re available in vibrant colors like metallic black and copper red, priced at about $12 per pint. Always remember: your choice of glaze will dramatically influence the final look of your pottery.
Safety gear is super important as well. Invest in a good pair of heat-resistant gloves and a face mask to protect yourself from fumes during firing. You can find safety gear for potters online, usually ranging from $20 to $50. It’s a small price to pay for your safety, trust me!
| Material | Product Example | Price |
|---|---|---|
| Raku Clay | Laguna Raku Clay | $25/25 lbs |
| Potter’s Wheel | Shimpo VL-Lite | $795 |
| Raku Glazes | Amaco Raku Glazes | $12/pint |
| Safety Gear (gloves/mask) | Pottery Safety Kit | $20-$50 |
Safety Precautions When Working with Materials
Before we get our hands dirty, let’s talk about safety. Raku firing can produce lots of smoke and potentially harmful fumes. Here’s how to keep yourself safe while you’re getting creative:
- Work in a well-ventilated area. I can’t stress this enough—for a proper setup, consider using a fan to circulate air away from your work zone.
- Wear protective gear. A mask is a small investment for your lungs, especially when dealing with glaze dust and fumes from the kiln.
- Familiarize yourself with your kiln. Know its temperature limits and always keep a fire extinguisher nearby. Have you tried the Paragon TnF-82? It’s compact and efficient, priced around $1,200.
Taking these precautions helps you focus on the fun stuff—creating beautiful pieces—without worrying about safety.
Techniques for Creating Raku Pottery
Now that we’ve covered materials and safety, let’s sink our teeth into the techniques that make Raku pottery truly special.
Step-by-Step Raku Firing Process
So here’s where the magic happens—firing your pieces! Raku firing differs from conventional firing methods. Here’s my go-to process, and trust me—it’s straightforward once you get the hang of it.
- Prepare your pieces: Make sure they’re bone dry before firing. If they feel cool to the touch, they’re ready!
- Load your kiln: Place your pottery in the kiln, ensuring they’re not touching each other. That way, you won’t end up with any weird melds!
- Crank that heat: Fire your kiln to about 1800°F—this is where things get sizzlin’. Monitor it closely; it typically takes about 30 minutes to reach that glorious temperature.
- Remove with care: Use your heat-resistant gloves to take your pieces out and place them in a reduction chamber. I love using a metal trash can for this since it’s easy and effective.
- Add combustible materials: Toss in newspaper or dry leaves to create smoke, then seal the chamber. This will give you those amazing, unpredictable glaze results.
Here’s a tip: Timing is key. The longer you let it sit in the reduction chamber, the more unique finishes you’ll get. But don’t go overboard—aim for about 10 minutes before pulling your pieces out to cool!
Common Techniques and Best Practices
Perfecting your technique is all about practice. Here are some essential tips I’ve learned along the way:
- Experiment with glazing techniques. Try layering different glazes or applying one color on top of another. It can yield splendid results!
- Test various textures. I’ve used everything from sponges to brushes to create patterns. Find what works for you to enhance your Raku designs.
- Understand your kiln’s quirks. Each kiln behaves differently. It’s worth taking notes during your firings to see what adjustments yield the best results.
“It’s all about experimentation. Some of my worst mistakes have turned into my favorite pieces.”
Glazing Methods for Raku Pottery
Now let’s get colorful! Raku glazing is where you can really express yourself. There are different methods and techniques you can apply. Here’s my lowdown on what works best.
Understanding Raku Glazing Effects
Everyone loves that gorgeous, lustrous finish that comes from Raku glazes. But what makes those colors pop? The interaction between the glaze and the reduction atmosphere during firing is what creates those amazing effects.
Different glazes react differently to the smoke created during firing, generating various colors and textures. For instance, metallic glazes can give off a stunning shine, while earthy colors may result in matte finishes.
- Try layering glazes to see how they blend. For example, applying a copper glaze underneath a clear glaze can yield dazzling results, making the colors really stand out.
As you work with glazes, keep your notes handy. Understanding the chemistry behind your glazes will help you create even more unique and exquisite pieces.
Troubleshooting Glazing Issues
If you’re like me, you’ve faced your fair share of glazing mishaps. Here are some common issues and ways to fix them:
- Bubbling or popping glazes? This usually occurs from improper application or air trapped beneath the glaze. Make sure you’re applying your glazes evenly and letting some of the bubbles burst while glazing.
- Uneven colors? It might be that you didn’t shake your glaze sufficiently. Always mix well before each use to ensure an even spread.
- Cracking glaze? This can happen if the clay body and the glaze expand differently while firing. Experiment with different glaze brands and types, and don’t hesitate to consult resources related to Raku glaze chemistry.
Raku Pottery Culture and History
Raku pottery isn’t just an artistic expression; it’s steeped in rich cultural history. Understanding where this practice comes from adds a deeper dimension to your work.
The Evolution of Raku Pottery
Raku originated in Japan during the 16th century as a simple way of creating tea vessels. The word “Raku” translates to “pleasure” or “enjoyment,” aptly describing the vibe of this pottery style. Early Raku pieces were handmade and often had a rustic feel, which connects beautifully to the philosophy of wabi-sabi—embracing imperfection.
“Raku isn’t just about pottery; it’s about creating art with a soul and a story.”
Modern Innovations in Raku Pottery
Today, Raku is evolving. Contemporary artists are blending traditional techniques with modern materials and designs. For instance, you can find creative use of recycled materials in Raku glazes, giving new life to old products.
If you enjoy experimenting, consider checking out some online classes or tutorials that focus on modern Raku techniques. You might end up trying something unconventional, like adding metallic paints after glazing for a mixed-media approach.
As we explore this unique art form, remember that your creativity knows no bounds. It’s okay to break the rules and find your unique style!
| Innovation | Description |
|---|---|
| Recycled Glazes | Artists are now using materials like old glass to create new glazes, promoting sustainability. |
| Mixed-Media Approaches | Combining Raku with other materials for innovative designs, such as using acrylics. |
| Interactive Workshops | Many pottery studios are offering workshops that incorporate modern Raku techniques. |
You’ve now got the tips, materials, and techniques to embrace this fascinating art form. Let your creativity shine—your next masterpiece is just around the corner!
Frequently Asked Questions
What is the difference between Raku clay and traditional pottery clay?
Raku clay is specifically formulated to withstand the extreme temperature changes during Raku firing. It typically includes a higher amount of grog, which helps prevent cracking. In contrast, traditional pottery clay may not have the same resilience, making it less suitable for Raku techniques.
How do I choose the right kiln for Raku pottery?
When selecting a kiln for Raku pottery, consider factors such as size, type (propane or electric), and maximum firing temperature. A small, portable Raku kiln is ideal for beginners, while more advanced potters may look for kilns with features like greater temperature control and multiple firing capabilities.
What are some safety precautions I should take when firing Raku pottery?
Always wear protective gear, including gloves, goggles, and a mask, to avoid exposure to harmful fumes and materials. Ensure proper ventilation in your workspace, especially during the firing process, and familiarize yourself with kiln safety guidelines to prevent accidents.
Can I use regular glazes for Raku pottery?
Regular glazes are generally not suitable for Raku pottery because they may not interact correctly with the rapid cooling and smoking process. Instead, look for specific Raku glazes designed to respond to the unique firing conditions, creating the characteristic surfaces and effects.
What common mistakes should I avoid when applying glazes to Raku pottery?
One common mistake is applying glaze too thickly, which can lead to running or uneven finishes. Additionally, not testing glazes before full applications can result in unexpected outcomes. It’s essential to experiment on smaller pieces to perfect your technique before moving to larger works.
How can I achieve unique effects with Raku glazing?
To create distinctive finishing touches with Raku glazing, experiment with layering different glazes, utilizing textured surfaces, or incorporating natural materials during the reduction phase. Each method can yield surprising effects, contributing to the unique aesthetics of your Raku pottery.
What are some advanced techniques I can use in Raku pottery?
Advanced techniques in Raku pottery include sgraffito, where designs are carved into the clay before glazing, and using multiple firing cycles to enhance colors and textures. Additionally, combining slip decorating or using different glazes during a single firing can create intricate results.
How can I prevent cracks in my Raku pottery during the firing process?
To prevent cracks, ensure that your pieces are properly dried and free of air bubbles. Use a low-shrinkage Raku clay that can handle rapid temperature changes. Monitoring the kiln temperature and gradually cooling the pieces can also help avoid cracking.
What historical influences helped shape Raku pottery?
Raku pottery originated in Japan in the 16th century, primarily influenced by tea ceremony practices. The aesthetics of simplicity and harmony in Japanese culture greatly shaped Raku’s development, emphasizing a connection to nature and imperfection, known as “wabi-sabi.”
Are there any innovative techniques currently trending in Raku pottery?
Recently, artists are exploring mixed media and incorporating non-traditional materials like metals or glass into Raku pieces. Innovations also include experimenting with digital design and 3D printing to create molds or unique shapes that blend modern technology with traditional Raku methods.
