When I first stepped into the world of pottery, I felt a delicious mix of excitement and trepidation. There’s just something about molding that cool, wet clay with your bare hands that ignites a spark of creativity within you. If you’re reading this, chances are you’re fired up about trying your hands at pottery too. Awesome! You’re in for a fun and fulfilling journey!
Pottery making is more than just a craft; it’s an artistic expression that lets you create tangible pieces of yourself. So, whether you’re looking to make your home a bit more stylish, craft some killer gifts, or just enjoy a therapeutic new hobby, I’m here to walk you through the beginner’s basics of creating beautiful pottery!
Table of Contents
- 1 Key Takeaways
- 2 Understanding Pottery Making
- 3 Common Materials and Tools Needed
- 4 Step-by-Step Pottery Techniques
- 5 Troubleshooting Common Pottery Mistakes
- 6 Safety and Best Practices in Pottery Making
- 7 Community and Learning Resources
- 8 Frequently Asked Questions
- 8.1 What are the different types of clay used in pottery?
- 8.2 How do I choose the right pottery tools as a beginner?
- 8.3 What should I consider when selecting a pottery class?
- 8.4 How long does it take to hone pottery skills?
- 8.5 What are the common mistakes to avoid when starting pottery?
- 8.6 How can I effectively troubleshoot glazing issues?
- 8.7 What safety precautions should beginners take while working with clay?
- 8.8 How do I maintain my pottery tools and equipment?
- 8.9 What are effective online resources for learning pottery techniques?
- 8.10 Why is practicing with different pottery techniques important?
Key Takeaways
- You’ll get a well-rounded overview of what to expect in pottery making, from materials to techniques.
- I’m sharing simple, step-by-step instructions that’ll have you crafting your first piece in no time.
- Troubleshooting common mistakes is a must; you’ll feel way less frustrated when armed with solutions!
- Safety tips are essential to keep your pottery-making experience enjoyable and without mishaps.
- Resources that connect you with the pottery community are invaluable for growth and inspiration.
Understanding Pottery Making
Pottery is fascinating, and it’s a craft that spans thousands of years. The beauty is in the journey and the process—whether you’re aiming to create bowls, vases, or sculptures. What’s critical for beginners (like we are) is having a solid understanding of that journey.
The Pottery Journey: An Overview
Think of your pottery journey as a trip where you’ll explore different pottery techniques and learn the full pottery process from start to finish. You won’t just jump into wheel throwing or glazing; you’ll have to start with the basics and build up your skills.
The primary steps in creating pottery include:
Choosing your clay: There are various types—earthenware, stoneware, and porcelain. Each has its own properties, which will affect your final piece. I recommend starting with stoneware, as it’s durable and versatile. A five-pound bag of stoneware clay averages around $15-20.
Forming your piece: You can either hand-build or use a wheel. Beginners often find hand building less intimidating.
Drying: Let your piece air dry to a leather-hard stage, where it still retains moisture but is firm enough for additional carving or alterations.
Bisque firing: This initial fire makes your piece sturdy enough for glazing. Make sure to budget for firing; local studios charge around $5-15 for bisque firing, depending on the weight of your piece.
Glazing: Choose glazes based on your desired finish and color. The unique glazes can add significant flair. A single glaze bottle costs around $5-15.
Final firing: After glazing, your piece gets fired again to set the glaze.
Seeing everything come together from raw clay to a finished beautiful ceramic piece is like watching magic unfold!
Common Materials and Tools Needed
Before we kick off any crafting, let’s gather our tools! Being well-equipped makes the pottery process smoother, and trust me, you don’t want to fumble midway because you’re missing a tool.
Essential Materials and Tools
Here’s a handy list to get you started:
| Material/Tool | Description | Approximate Price |
|---|---|---|
| Clay | Start with a beginner-friendly stoneware clay. | $15-20 (5 lbs) |
| Potter’s Wheel | A sturdy wheel will help you shape your clay pieces. | $300-600 (new) |
| Rolling Pin | Useful for flattening clay during hand-building. | $15-25 |
| Trimming Tools | For refining your shape. | $10-20 |
| Glazes | Colors and finishes for your pottery. | $5-15 per bottle |
| Kiln | Required for firing; many start with local studios. | Varies, usually $5-15 per firing |
Once you collect all your essentials, you’re set to start crafting!
Step-by-Step Pottery Techniques
Time to roll up our sleeves and get messy! I love how pottery allows us to play with our creativity. Here’s how to start making your very first piece!
Hand-Building Pottery Techniques
Don’t worry if you don’t have access to a potter’s wheel; you can still create incredible pieces by using hand-building techniques. Here are the three main methods you should definitely try:
1. Pinch method: This is as primitive as it gets! Start with a ball of clay and, using your thumb and fingers, pinch the clay while rotating it. It’s fantastic for making bowls!
2. Slab construction: Roll out flat pieces of clay and cut them into shapes to create a box or a vase. Use a rolling pin for this! It’s super enjoyable to combine different shapes and stack them to your desire.
3. Coil building: Roll out long snakes of clay and layer them on top of each other to create walls for your piece. It’s a traditional method and can yield stunning designs.
These hand-building techniques are not just fun; they’re also a great way to get familiar with working with clay. Remember, it’s all about having a good time, and mistakes are just stepping stones to improvement!
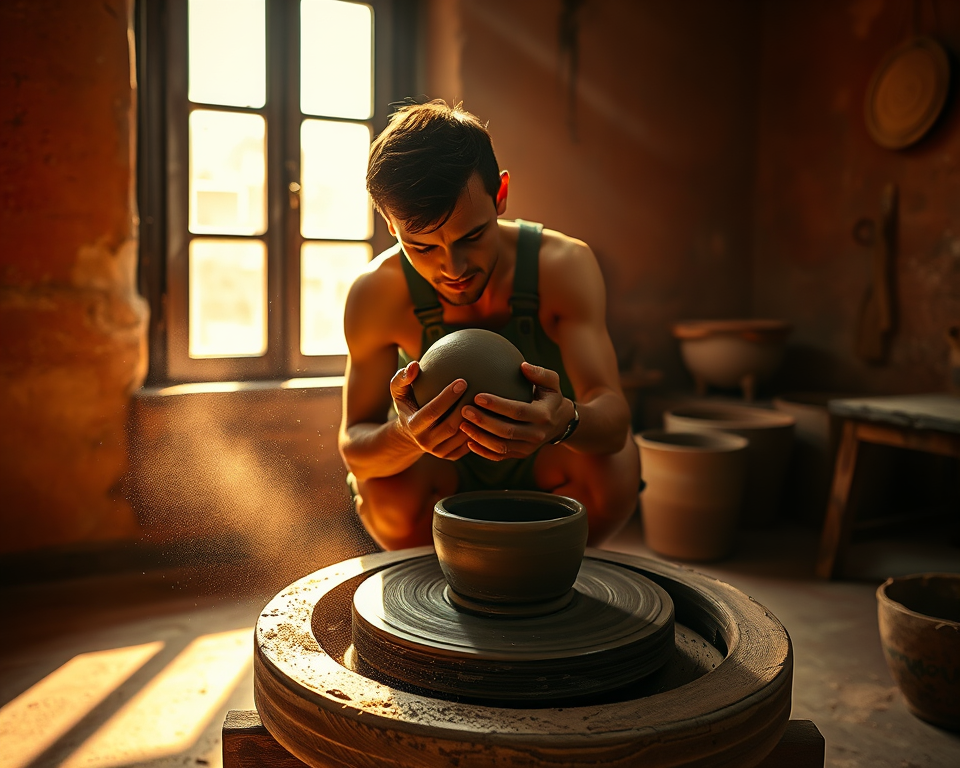
Using a Potter’s Wheel
If you’ve got access to a potter’s wheel, you’re in for some fun! Wheel throwing can feel a bit daunting at first, but trust me, once you get the hang of it, it’s thrilling. Here’s my simple roadmap to wheel throwing:
1. Centering the clay: Start with a ball of clay on the wheel and use your hands to push down and outward to center it. This is crucial—take your time with this step!
2. Opening the clay: Press your thumb into the center to form a bowl shape.
3. Pulling up the walls: Use your fingers to gently pull the clay upward, making the walls of your pot. This part takes practice to get the thickness just right.
4. Shaping: Use your hands to shape the clay into your desired form.
5. Trimming: Once it’s leather-hard, trim to bring your piece to life with clean edges.
Throwing on the wheel is exhilarating and can feel freeing. Just remember, the key is practice!
Troubleshooting Common Pottery Mistakes
I can’t stress this enough: mistakes are bound to happen. Embrace them! Here’s my little red flag list of common pottery pitfalls you might encounter, along with tips for fixing those hiccups.
Recognizing and Fixing Common Flaws
Here are some typical mistakes and how to tackle them:
Cracks: If your clay dries too quickly, cracks might form. To prevent this, keep your piece covered with a damp cloth while you work on it.
Glazing issues: Over-application of glaze can lead to drips during firing. To avoid this, apply a thin layer and let it dry before adding more.
Weak structures: If it feels fragile, check to see if walls are too thin after shaping. It’s a bummer, but if identified early, you can reinforce them before they dry completely.
“Mistakes are the portals of discovery.” ~ James Joyce.
If you encounter any strange problem, don’t hesitate to look stuff up online or chat with your local pottery community. Don’t let frustrations sideline you; learning is part of the fun!
Safety and Best Practices in Pottery Making
Did I mention having fun? Well, safety’s essential too! We want you to enjoy this journey without a hitch.
Essential Safety Tips for Beginners
Handling clay can be an absolute blast, but let’s keep it safe. Here’s what to keep in mind:
Work in a well-ventilated area: If you’re using glazes or chemicals, ensure there’s a flow of fresh air. Trust me, that makes a world of difference!
Wear a mask when needed: If you’re sanding or dealing with dry clay dust, a simple mask can protect your lungs.
Use protective gear: Safety goggles can be your best friend during certain techniques. Seriously, keeping those peepers safe is essential!
Clean up: Make sure to clean up after every session. Clay can be tackled with water, but avoid putting it down your sink. Instead, bag it and dispose of it with your regular trash.
Staying safe while having fun is the goal!
Community and Learning Resources
The pottery world is vast, and having a community around you can fuel your creativity. Here are some great ways to forge connections and further your skills!
Finding Local Classes and Workshops
Hands-on guidance is invaluable, especially when starting. Local community centers or art studios often offer beginner pottery classes where you can meet fellow budding artisans. I found my local classes through meetup sites and community boards.
Local Pottery Classes:
- Coconut Grove Arts Festival: Offers beginner workshops in pottery.
- ClaySpace: A welcoming local studio with group classes starting at $40 per lesson.
Tip: Scour your neighborhood bulletin boards or social media groups. Pottery enthusiasts love to share resources!
Online Resources and Tutorials
If you’re more the DIY type or can’t find any classes, the internet is golden. Sites like YouTube are filled with tons of video tutorials from potters around the world.
For structured learning, consider:
Skillshare: Courses on everything from hand-building to throwing.
Pottery Heads: This site boasts an array of virtual courses focusing on different aspects of pottery-making.
Comfortably learn from home at your pace—enjoy your creative expression!
“The more I clay, the more I realize I’m just getting started.”
It’s okay to be a beginner. Every pro was once an amateur, and every piece has its unique story. Enjoy the ride, let your creative juices flow, and don’t be afraid to try new things!
Frequently Asked Questions
What are the different types of clay used in pottery?
There are several types of clay for pottery, with the most common being earthenware, stoneware, and porcelain. Earthenware is porous and best for beginners, while stoneware is durable and suitable for functional ware, and porcelain is known for its delicacy and translucence, requiring more advanced techniques to work with.
How do I choose the right pottery tools as a beginner?
As a beginner, you should start with essential tools such as a sponge, knife, needle tool, rib, and rolling pin. These allow for basic shaping and detailing. As you progress, you can add advanced tools like trimming tools and various sculpting implements to enhance your capabilities.
What should I consider when selecting a pottery class?
When choosing a pottery class, consider the teacher’s experience, class size, and the type of wheel or hand-building techniques taught. It’s also beneficial to check if the course offers a supportive community and access to necessary equipment, especially for beginners.
How long does it take to hone pottery skills?
Skill development in pottery can vary widely, but consistent practice is key. Many beginners see significant improvements within a few months, while mastering techniques may take several years of dedicated practice. Regular participation in classes and workshops can accelerate this process.
What are the common mistakes to avoid when starting pottery?
Common mistakes for beginners include not wedging clay properly to remove air bubbles, applying uneven pressure when throwing on the wheel, and applying too thick or uneven layers of glaze. Learning to recognize these issues early can help improve your results significantly.
How can I effectively troubleshoot glazing issues?
To troubleshoot glazing issues, always test glazes on sample pieces before applying them to final work. Inspect for common problems like crawling, runny glazes, or pinholes, and adjust the thickness or application technique as needed. Proper kiln firing temperatures also play a crucial role in glaze success.
What safety precautions should beginners take while working with clay?
Beginners should always wear a dust mask when mixing dry clay to avoid inhalation, use gloves when handling glazes, and ensure a well-ventilated workspace. Additionally, cleaning up carefully to avoid clay dust accumulation is essential for a safe crafting environment.
How do I maintain my pottery tools and equipment?
To maintain your pottery tools, rinse clay off tools immediately after use to prevent drying and cracking. Store them in a cool, dry place. For your pottery wheel, regularly clean the splash pan and check for wear to ensure optimal performance.
What are effective online resources for learning pottery techniques?
Numerous online resources can enhance your pottery skills. Popular platforms like YouTube offer tutorials from experienced potters, while websites like Skillshare and Udemy host comprehensive courses. Joining online pottery forums can also provide valuable tips and community support.
Why is practicing with different pottery techniques important?
Practicing various pottery techniques allows you to explore creativity and discover your unique style. It broadens your skill set, making you more versatile in creating both functional and artistic pieces, and helps you identify areas of interest for more in-depth exploration.