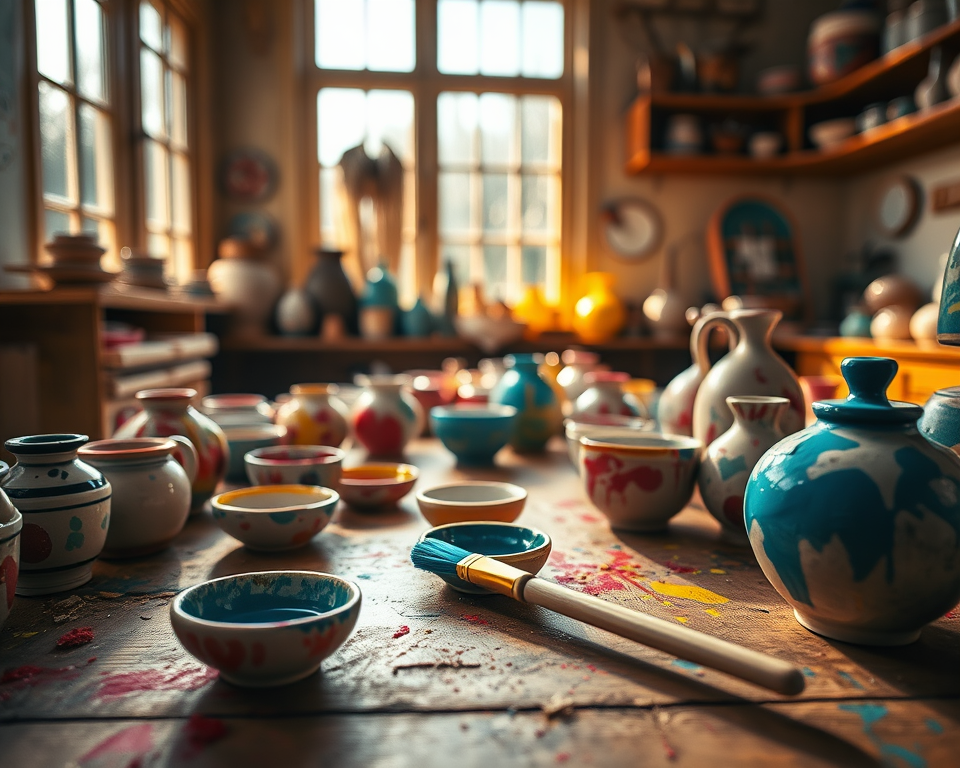
Pottery painting is such a blast—and it’s even more exciting when you realize how many fabulous options you have for paints! Whether you’re just starting out or have dabbled in art for ages, finding the right paint can make or break your project. I can’t tell you how many times I’ve been knee-deep in paint, only to wish I’d chosen a different type. Trust me, choosing wisely transforms your creative experience into something magical.
Table of Contents
- 1 Key Takeaways
- 2 Types of Paint for Pottery
- 3 Application Techniques for Painting Pottery
- 4 Safety Tips for Using Pottery Paints
- 5 Creative Pottery Projects for Inspiration
- 6 Frequently Asked Questions
- 6.1 What are the differences between underglaze and glaze in pottery painting?
- 6.2 How can I make sure my acrylic paints are suitable for pottery?
- 6.3 What preparation steps are essential before painting pottery?
- 6.4 What techniques can I use for applying specialty paints, like metallic or glow-in-the-dark?
- 6.5 How do I identify safe paint brands for pottery?
- 6.6 What should I do to seal painted pottery for food use?
- 6.7 Can I use regular acrylic paint on bisque pottery?
- 6.8 What are common mistakes to avoid when painting pottery?
- 6.9 How can I troubleshoot issues with paint application on pottery?
- 6.10 Are there specific firing techniques for underglazes?
Key Takeaways
- Choosing the right type of paint is crucial; acrylic, underglazes, and glazes all have specific uses.
- Always consider safety; look for non-toxic and food-safe options if your pottery will be used for serving food.
- Mastering application techniques can greatly enhance your pottery’s aesthetic—don’t skip proper prep work!
- Embrace the fun of creative projects by trying out specialty paints like metallics or glow-in-the-dark finishes.
- Engage with your pottery community for tips and inspiration; we’re all in this together!
Types of Paint for Pottery
Choosing the right paint for your pottery is like picking the perfect toppings for a sundae—one wrong move, and it’s just not as sweet. Let’s break down the main players in the paint game: acrylics, underglazes, and glazes. Each comes with its own characteristics and possibilities.
Acrylic Paints for Pottery
First up: acrylic paints! These beauties are fast-drying, versatile, and come in a rainbow of colors. If you’re a beginner, this is where I usually tell folks to start. You want something that works well on various surfaces, and acrylics check that box. They’re non-toxic and perfectly safe for kids (yep, I’ve had my little ones getting messy with these, and it was a delight!).
Recommended Product: Apple Barrel Acrylic Paint Set – This set offers vibrant colors, is water-based, and can be found for around $9.49 for a large pack.
Imagine creating your next masterpiece with these beauties. They’re a great choice for decorative pieces, but keep in mind they’re not food-safe unless you seal them correctly.
Underglazes and Glazes
Next, we have underglazes. If you want to add colorful designs before a clear glaze layer, underglazes are your best pals. Unlike standard paints, they require firing in a kiln, which means they’re perfect for more permanent applications on pottery that you plan to use often.
Pro Tip: You can play with underglazes to achieve unique designs—layering them can create amazing effects.
When it comes to glazes, these are your final coat, providing that glossy finish we all know and love. Glazing can be a little more complex, but fear not—once you get the hang of it, you’ll want to glaze everything.
Recommended Product: Low Fire Gloss Glaze Set – At about $25 for a set of 6, this is a solid investment for polished, food-safe finishes!
Here’s a little comparison table to help you weigh the differences:
| Paint Type | Best For | Food Safety | Application |
|---|---|---|---|
| Acrylic Paint | Decorative items | No (unless sealed) | Easy, no kiln firing required |
| Underglazes | Detailed designs before glazing | No (requires glaze) | Best for kiln-fired projects |
| Glazes | Final protective coat | Yes (if food-safe) | Requires kiln firing |
Specialty Paints (e.g., Metallic, Glow-in-the-Dark)
Feeling adventurous? Specialty paints are a fun way to add an extra layer of creativity to your pottery. Metallic paints can bring a little glam, while glow-in-the-dark options are like the cherry on top after the sun sets—perfect for night time gatherings!
Recommended Product: FolkArt Metallic Acrylic Paint – Priced around $6.48 per bottle, it delivers beautiful metallic finishes that look stunning on any ceramics.
These specialty paints are not just pretty faces, either! They’re great for adding that wow factor to your pieces and are conversation starters, for sure.
Application Techniques for Painting Pottery
Okay, so you’ve got your paints picked out. Now, how do you apply them, and what prep work goes into a successful pottery project? Don’t worry; I’ve got you covered with steps that’ll make you feel like an absolute pro!
Preparing Pottery for Painting
Before you even think about dipping that brush into paint, preps like cleaning and drying are key. You wanna remove any dust or grease, so your paint can stick like a champ. Warm soapy water usually does the trick, but be gentle—no need to scrub too hard and risk damaging your piece.
“The more you prep, the less you’ll regret!”
Once your piece is clean, allow it to dry thoroughly. Avoid rushing this step; I’ve learned the hard way that damp surfaces lead to less-than-desirable results.
Step-by-Step Painting Instructions
Now let’s get into the nitty-gritty! Painting pottery can seem daunting, but it’s actually pretty straightforward!
Choose your brushes: Different strokes do different things. A wider brush for larger areas, smaller ones for details. Don’t overthink it—just have fun!
Start with a base layer: If you’re using multiple colors, start with a base color for your pottery. Let it dry completely before adding designs.
Add your designs: Use your smaller brushes for details. Whether it’s dots, stripes, or intricate patterns, take your time and enjoy the process.
Allow drying time between each layer: Each layer needs to dry thoroughly. Patience is key!
Remember, if it doesn’t turn out as you imagined, don’t sweat it! Pottery painting is all about expressing your creativity, and there’s beauty in imperfections.
Safety Tips for Using Pottery Paints
Before we dive headfirst into painting, let’s touch on an important topic: safety. It’s essential, especially if you’re working with kids or creating functional pottery.
Choosing Non-Toxic Paints
When picking paints, always check for non-toxic labels. Some brands can be sketchy, and you wouldn’t want to use materials that could harm you or your family.
Safe Brands:
– Ceramcoat Acrylics – Great for its non-toxic promise and around $7 for a 2oz bottle.
– Sculpey Polymer Clay Paint – A bit pricier at about $12 for a set, but super safe for kids!
As you’re sifting through options, always look for eco-friendly certifications—that indicator can save headaches down the road.
Ensuring Food Safety with Your Painted Pottery
If you’re planning to eat off your finished work, go for food-safe paints and finishes. Not all pottery paints are created equal, and without proper sealing, you could end up with harmful chemicals leaching into food.
To give your painted ceramics the best shot at being food-safe, you’ll want to apply a food-grade glaze over your painted designs. Once fired (if applicable), it creates a non-porous barrier, perfect for keeping your creations safe for meal service.
Common User Frustrations and Solutions
Now, let’s not forget about the possible frustrations you might encounter. Trust me; I’ve faced my share. But every issue has a solution—let’s dig in.
Confusion About Paint Types and Uses
With so many paints out there, I often find it’s easy to feel overwhelmed. Many times, I’ve gone to the craft aisle and felt like I was staring at a wall of mystery.
“When in doubt, ask! Fellow crafters are often eager to help.”
Don’t hesitate to reach out to your local craft store staff or even hop on social channels! Community forums are an invaluable resource when you’re sifting through paint types for specific projects.
Issues With Paint Safety and Quality
You may feel uncertain about which brands to trust. Look for trusted names that have been around, read through online reviews, and pay attention to customer feedback.
Let’s be real: Not every cheap paint is a good deal, especially when called to perform on food items. It’s worth it to spend a little extra on reputable brands rather than scrapping an entire project due to paint issues later down the line.
Creative Pottery Projects for Inspiration
Now that you’re armed with the knowledge of choosing and applying paint, it’s time to embrace the creative spirit!
Examples of Painted Pottery
Need ideas? Let’s explore some fun project possibilities.
Custom Mugs: Grab some inexpensive white mugs from the dollar store and go crazy! Use acrylics for personalized patterns or sayings.
Planters: Transform bland planters into eye-catching decor with eye-popping colors. If you’re using them outdoors, make sure to seal them properly for protection against the elements.
Gift Items: Painted pottery makes fantastic gifts! Personalized pet bowls, decorative plates, or even special keepsakes can be created using various paints and techniques.
Community and User Experiences
Getting involved in the pottery community can be one of the most rewarding parts of this journey. Sharing experiences, challenges, and triumphs enriches your process.
Look for local pottery groups or online communities—I’ve found these forums to be a treasure chest of inspiration and knowledge. Witnessing shared projects or discussing techniques can reinvigorate your own creative flow!
Let’s keep this energy going! Remember, everyone has a unique journey, so don’t feel pressured to create perfect pieces on your first go. Keep painting, have fun, and let your creativity run wild!
Frequently Asked Questions
What are the differences between underglaze and glaze in pottery painting?
Underglazes are colorants applied to pottery before glazing, allowing intricate designs to show through the final layer. In contrast, glazes are typically clear or opaque coatings that provide a glassy finish and can change the color of the underglaze once fired. Understanding these differences can help in selecting the right application technique for your pottery projects.
How can I make sure my acrylic paints are suitable for pottery?
To ensure your acrylic paints are suitable for pottery, look for non-toxic, water-based options specifically labeled for ceramics. Always check product descriptions for compatibility with porous surfaces, and make sure they are designed for high-temperature firing if you plan to use them for functional pottery.
What preparation steps are essential before painting pottery?
Before painting pottery, it’s crucial to clean all surfaces with soap and water to remove dirt and oils. Lightly sand the surface if necessary, and allow it to dry completely. Applying a primer can enhance paint adherence, while ensuring the pottery is free of dust will prevent blemishes in the finished product.
What techniques can I use for applying specialty paints, like metallic or glow-in-the-dark?
Specialty paints often require unique application techniques. For metallic paints, use a soft brush or sponge to achieve an even, streak-free finish. When working with glow-in-the-dark paints, multiple thin layers may be necessary to enhance luminosity. Always follow the manufacturer’s instructions for best results.
How do I identify safe paint brands for pottery?
Safe paint brands for pottery are usually clearly labeled as non-toxic and may carry certifications such as AP (Approved Product) or ACMI (Art and Creative Materials Institute) seals. Researching brand reputations, reading customer reviews, and consulting artist communities for recommendations can also help ensure safety and quality.
What should I do to seal painted pottery for food use?
To seal painted pottery for food use, it’s vital to apply a food-safe finish after the paint has cured. Look for sealants specifically labeled as food-safe and follow application instructions carefully. Firing the piece in a kiln with a food-safe glaze can also enhance durability and safety.
Can I use regular acrylic paint on bisque pottery?
While regular acrylic paint can be used on bisque pottery, it is not recommended for functional pieces that will be washed or used for food. It’s best to use acrylics specifically formulated for ceramics to ensure longevity and prevent peeling or fading over time.
What are common mistakes to avoid when painting pottery?
Common mistakes include not properly preparing the surface, applying paint too thickly, and not allowing enough drying time between coats. Additionally, forgetting to use food-safe products for functional pottery can lead to health hazards. Always pay attention to detail and follow guidelines for best practices.
How can I troubleshoot issues with paint application on pottery?
If you encounter issues like streaks or bubbling, ensure your workspace is clean, and your paints are mixed adequately before use. If paint streaks occur, try using a softer brush or a smoother application technique. For bubbles, avoid applying heat prematurely and let the piece cure slowly instead.
Are there specific firing techniques for underglazes?
Yes, underglazes often require specific firing techniques. Generally, underglazes can be fired at a lower temperature before applying a clear glaze on top. It’s essential to consult specific product guidelines for the best firing temperature and method to achieve optimal colors and durability without distortion.